How to create Copy and Color Puzzles?
This tutorial shows how to create Copy and Color puzzles with Puzzle Maker Pro - Copy and Color.
The tutorial applies to:
- Puzzle Maker Pro - Copy and Color
- Puzzle Maker Pro - Copy and Color - Reseller
What are Copy and Color puzzles?
Copy and Color puzzles are puzzles where parts of an image are shown. You have to finish the drawing by filling in the missing parts. An example of the image can be shown.
The image is divided in parts using a grid layout, with a number of rows and columns. In addition to that, help lines can be printed on each puzzle piece to make it easier to fill in the missing parts.
These puzzles are great for activity books, both for young ones, but also for elderly (as mental activity). In addition to the 'regular' Copy and Color, it's also possible to print only the 'puzzle' image, boosting creativity by drawing the missing parts without an example image.
Copy and Color Overview
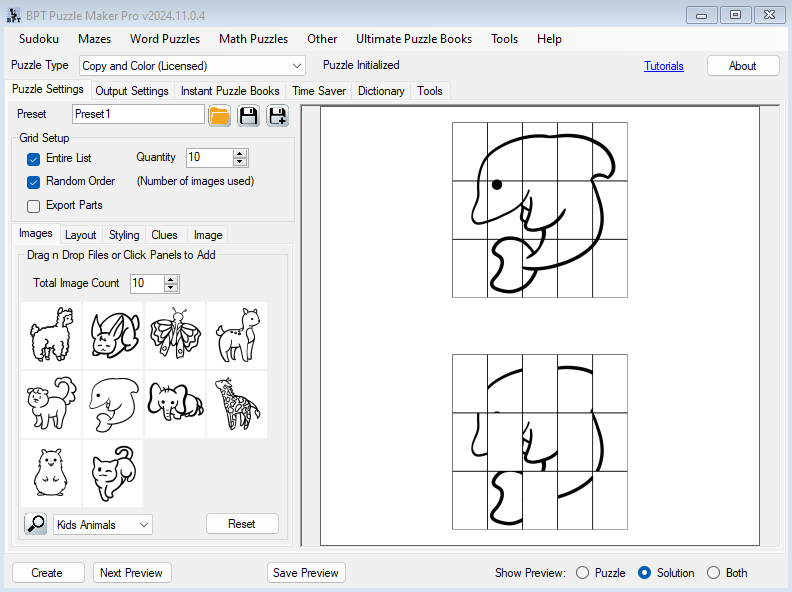
In this screenshot you can see the example image at the top and a 'puzzle' image at the bottom, in the preview panel at the right. The goal is to complete the image at the bottom and then optionally color it. The images you see here are included in Puzzle Maker Pro, but you can easily use your own images for unique and fun results.
Puzzle Maker Pro - Copy and Color - Getting Started
Most modules in Puzzle Maker Pro work more or less the same way. Here are the main parts for Copy and Color:
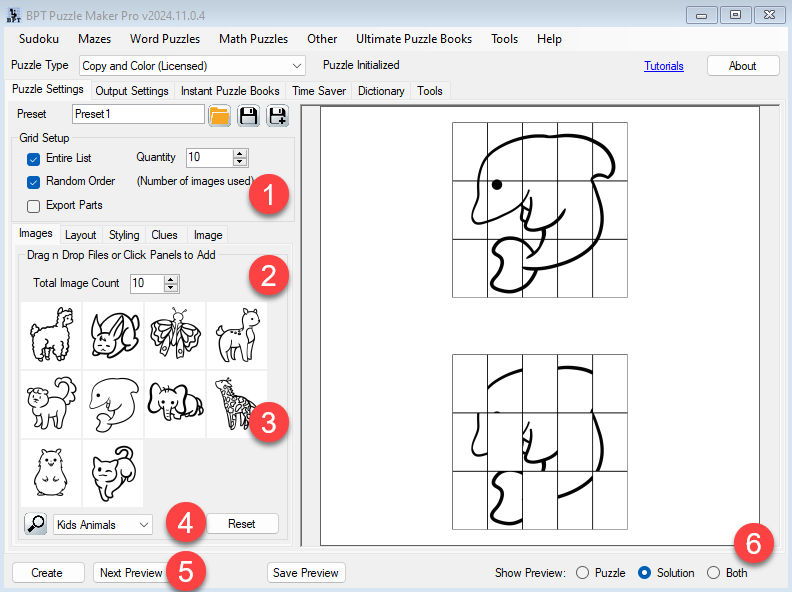
- Control settings - how many images to use, randomize the image order, and optionally Export the puzzle and example images (in addition to a combined 'puzzle' image)
- The Images area - Change 'Total Image Count' to add more images to your list
- Click the little panels with the animals to change the image, or just drag and drop an entire list of images on one of the panels
- There are a few presets with default options to fill the image list, the Kids Animals option is the best for Copy and Color
- Click Next Preview to see a new puzzle image
- For most modules you can toggle between Puzzle and Solution, but with Copy and Color the solution (example image) is already included in the puzzle.
Copy and Color Layout Settings
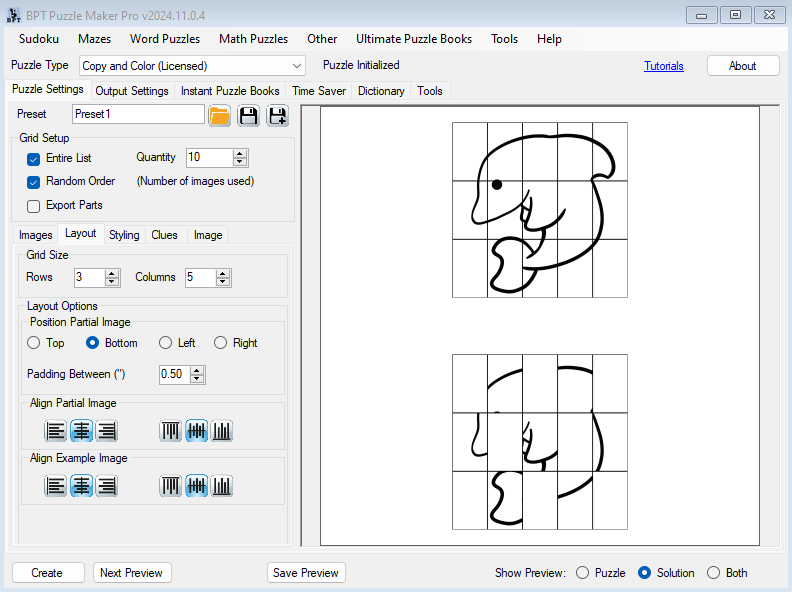
By default the example image is shown at the top, the puzzle image is shown at the bottom. You can change this, and also set the alignment for either puzzle.
The grid for the example and puzzle will always use the dimensions of the image you use (rectangular or square). There are several settings to control the overall puzzle image (that contains both grids), which will be discussed later.
Copy and Color Styling Options
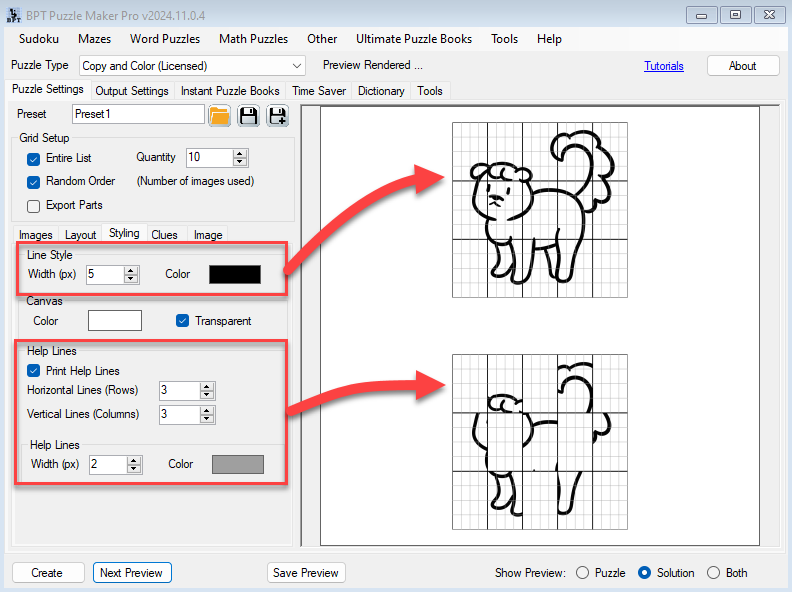
The Line Style is used for the basic lines that define the grid. In the example, these are the black lines.
Additionally you can add 'help lines', additional lines that make it easier to draw / complete the image. In the example these are the thin gray lines.
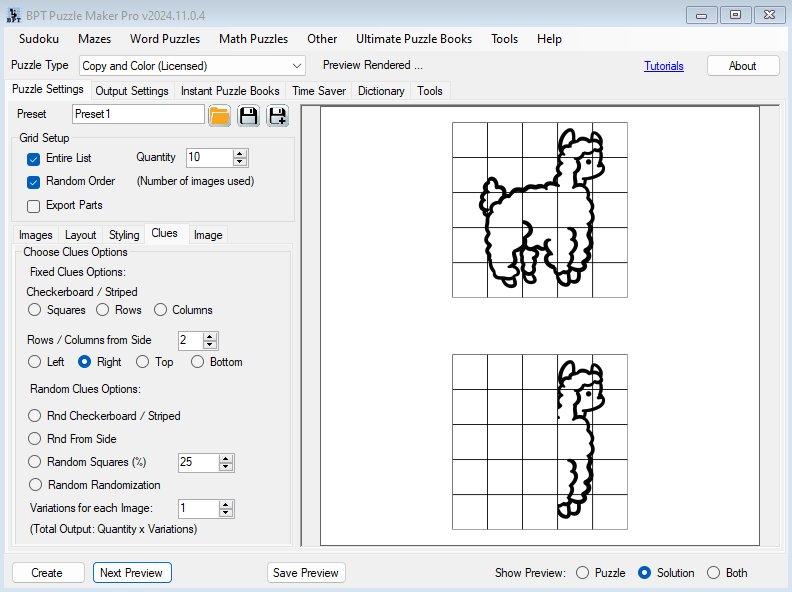
Copy and Color Clues Options
The "Clues" tab is where you set the magic for this puzzle module: Many different ways to create incomplete images.
You can see many options, including a few randomization options:
- Checkerboard will create a checkerboard pattern where neighboring squares are switched on and off. Like a checkerboard
- Striped Rows / Columns creates a striped pattern, where neighboring rows (or columns) are switched on and off
- Rows / Columns from Side - You can set this to display a fixed number of rows or columns from one of the sides. The screenshot shows only 2 columns from the right.
- "Rnd Checkerboard / Striped" will select one of these three options to use for a puzzle
- Rnd From Side will select one of these four options
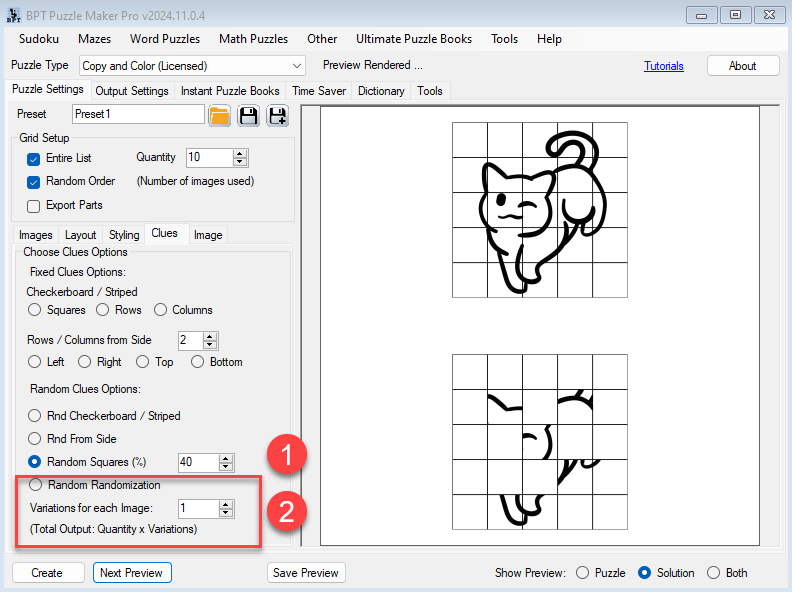
- Random Squares (1): Select the percentage of squares that will be shown, e.g. 40% in the screenshot
- Random Randomization (2): Pick any of the options in this list. This can be powerful when you also set the Variations number: This way you can quickly create 2 or 5 or 10 different puzzle images for each source image. For example in a classroom where you want to give each person a different puzzle to work on.
Note: The "Quantity" setting defines the number of images to process. The Variation setting controls the number of puzzles for each image. With a Quantity of 7 and a Variation of 3, you will get 21 different puzzles.
Output / Export Options
In addition to generating puzzles, it's important to create your output in the right format.
The grid images that are saved with the "Export Parts" option, will be using the dimensions from the source image. If you use images with 2000 x 1000 pixels, the grid images will have this size as well.
The Puzzle image will be created using the settings on the "Output Settings" tab, just like sudoku or word search puzzles.
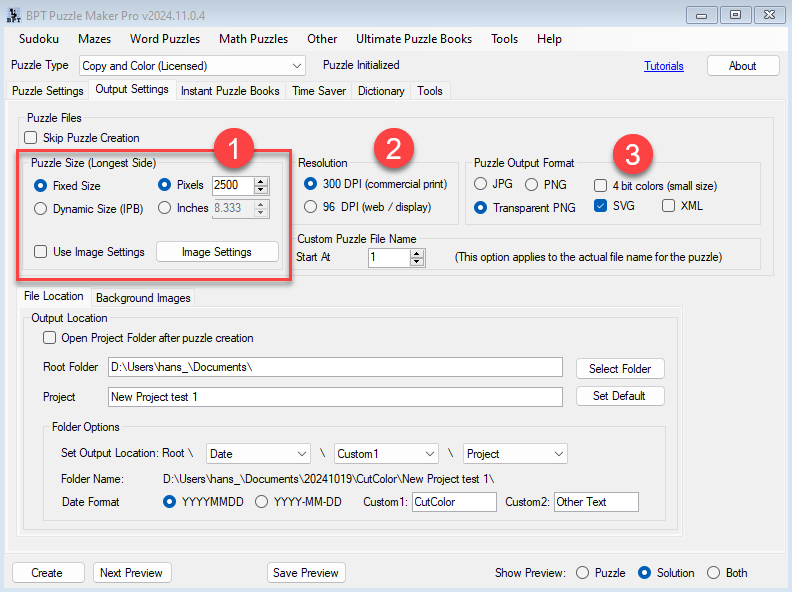
- Puzzle Size - determines the size of the puzzle image - we'll discuss this in detail in the following paragraphs
- Resolution - The DPI setting for the saved image. Please be aware that a 3000x3000 pixel image will have the same file size for 300 DPI and 96 DPI. The DPI setting will be used by Powerpoint, InDesign, etc to determine the print size of the iamge when it's imported
- Puzzle Output Format - You can use JPG, PNG and Transparent PNG. With PNG output you can also use 4 bit colors, which reduces the size significantly, when you use B/W or grayscale images.
Fixed Size Output
With Fixed Size Output you can set the size in pixels or inches. The output 'puzzle' image (the combined image with the example grid and the puzzle grid) will be square, using the fixed size you set. This works well for rectangular source images.
Dynamic Size (IPB) Output
Dynamic Size (IPB) output will use the size you set for the instant puzzle books. This is based on the trim size (e.g. 8.5" x 11") and the Page Layout settings.
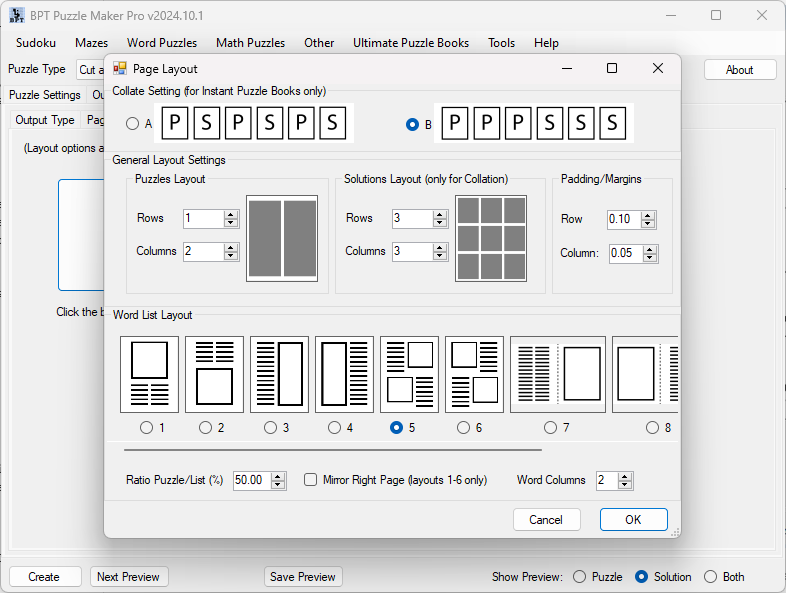
You can set the page layout on the Instant Puzzle Books -> Page Layout tab, then click the Edit Layout button. (This is only available if you have the Time Saver add-on for Kids Color Puzzles).
In the example you can see a layout with 1 row and two columns. When you use Dynamic Size, Puzzle Maker Pro will calculate the exact size of each puzzle area, based on the trim size, margins and layout settings, and use this to create the puzzle images (JPG/PNG).
Using Dynamic Size (IPB) Output without Time Saver
If you don't have the Time Saver add-on, and you want to benefit from the Dynamic Size output, you can set the trim size to exactly the size you want for the puzzle (with or without margins). Without the Time Saver there will be one puzzle per page. You can find the trim size settings on the Instant Puzzle Books -> Page Format tab.
Use Image Settings
For both the Fixed Size and the Dynamic Size options, you can choose to use the additional "Image Output" settings. This name may be confusing with all the 'image' variations, in Puzzle Maker Pro it's an option to create social media images (or memes) with your puzzles, by adding a title, description and watermark.
You can click the "Use Image Settings" option, or click the "Image Settings" button to edit these settings.
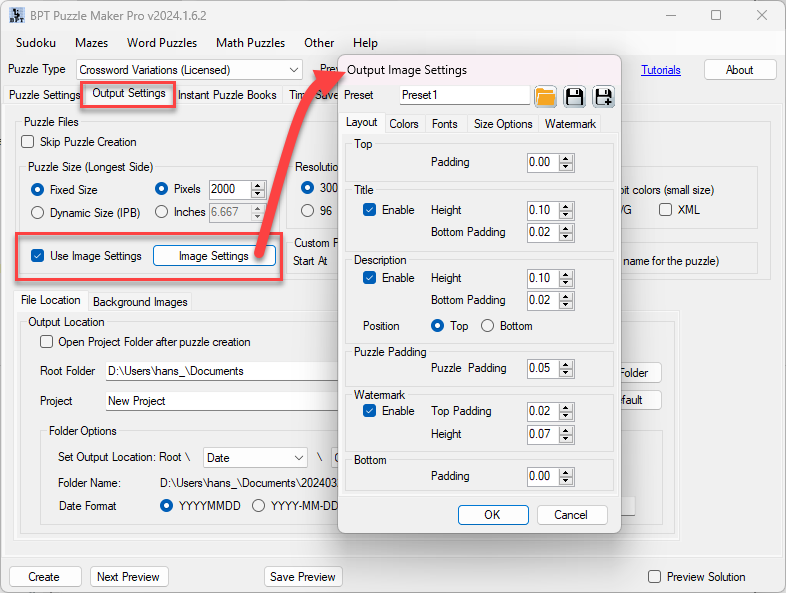
Here you can set the size for different areas (e.g. Title, Description, Watermark) on the output image, along with text options and a watermark (e.g. your website url) and a logo.
This will define the area that's available for the example grid and puzzle grid.
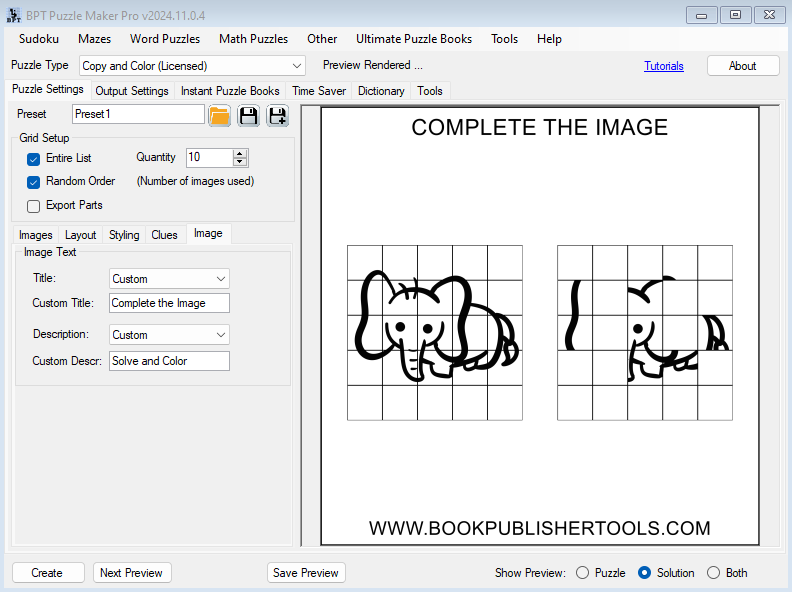
On the Image tab in Copy and Color you can set the title and description options (dynamic or fixed) that will be printed.