How to create Social Media Images with Puzzles using Puzzle Maker Pro
This tutorial describes how to create Social Media Images with Puzzles using Puzzle Maker Pro.
For some modules, e.g. Crossword Variations, it's now possible to create image output with a title and a watermark, in addition to the regular output for puzzle books. Please be aware, this is not yet available for all puzzle modules.
Introduction
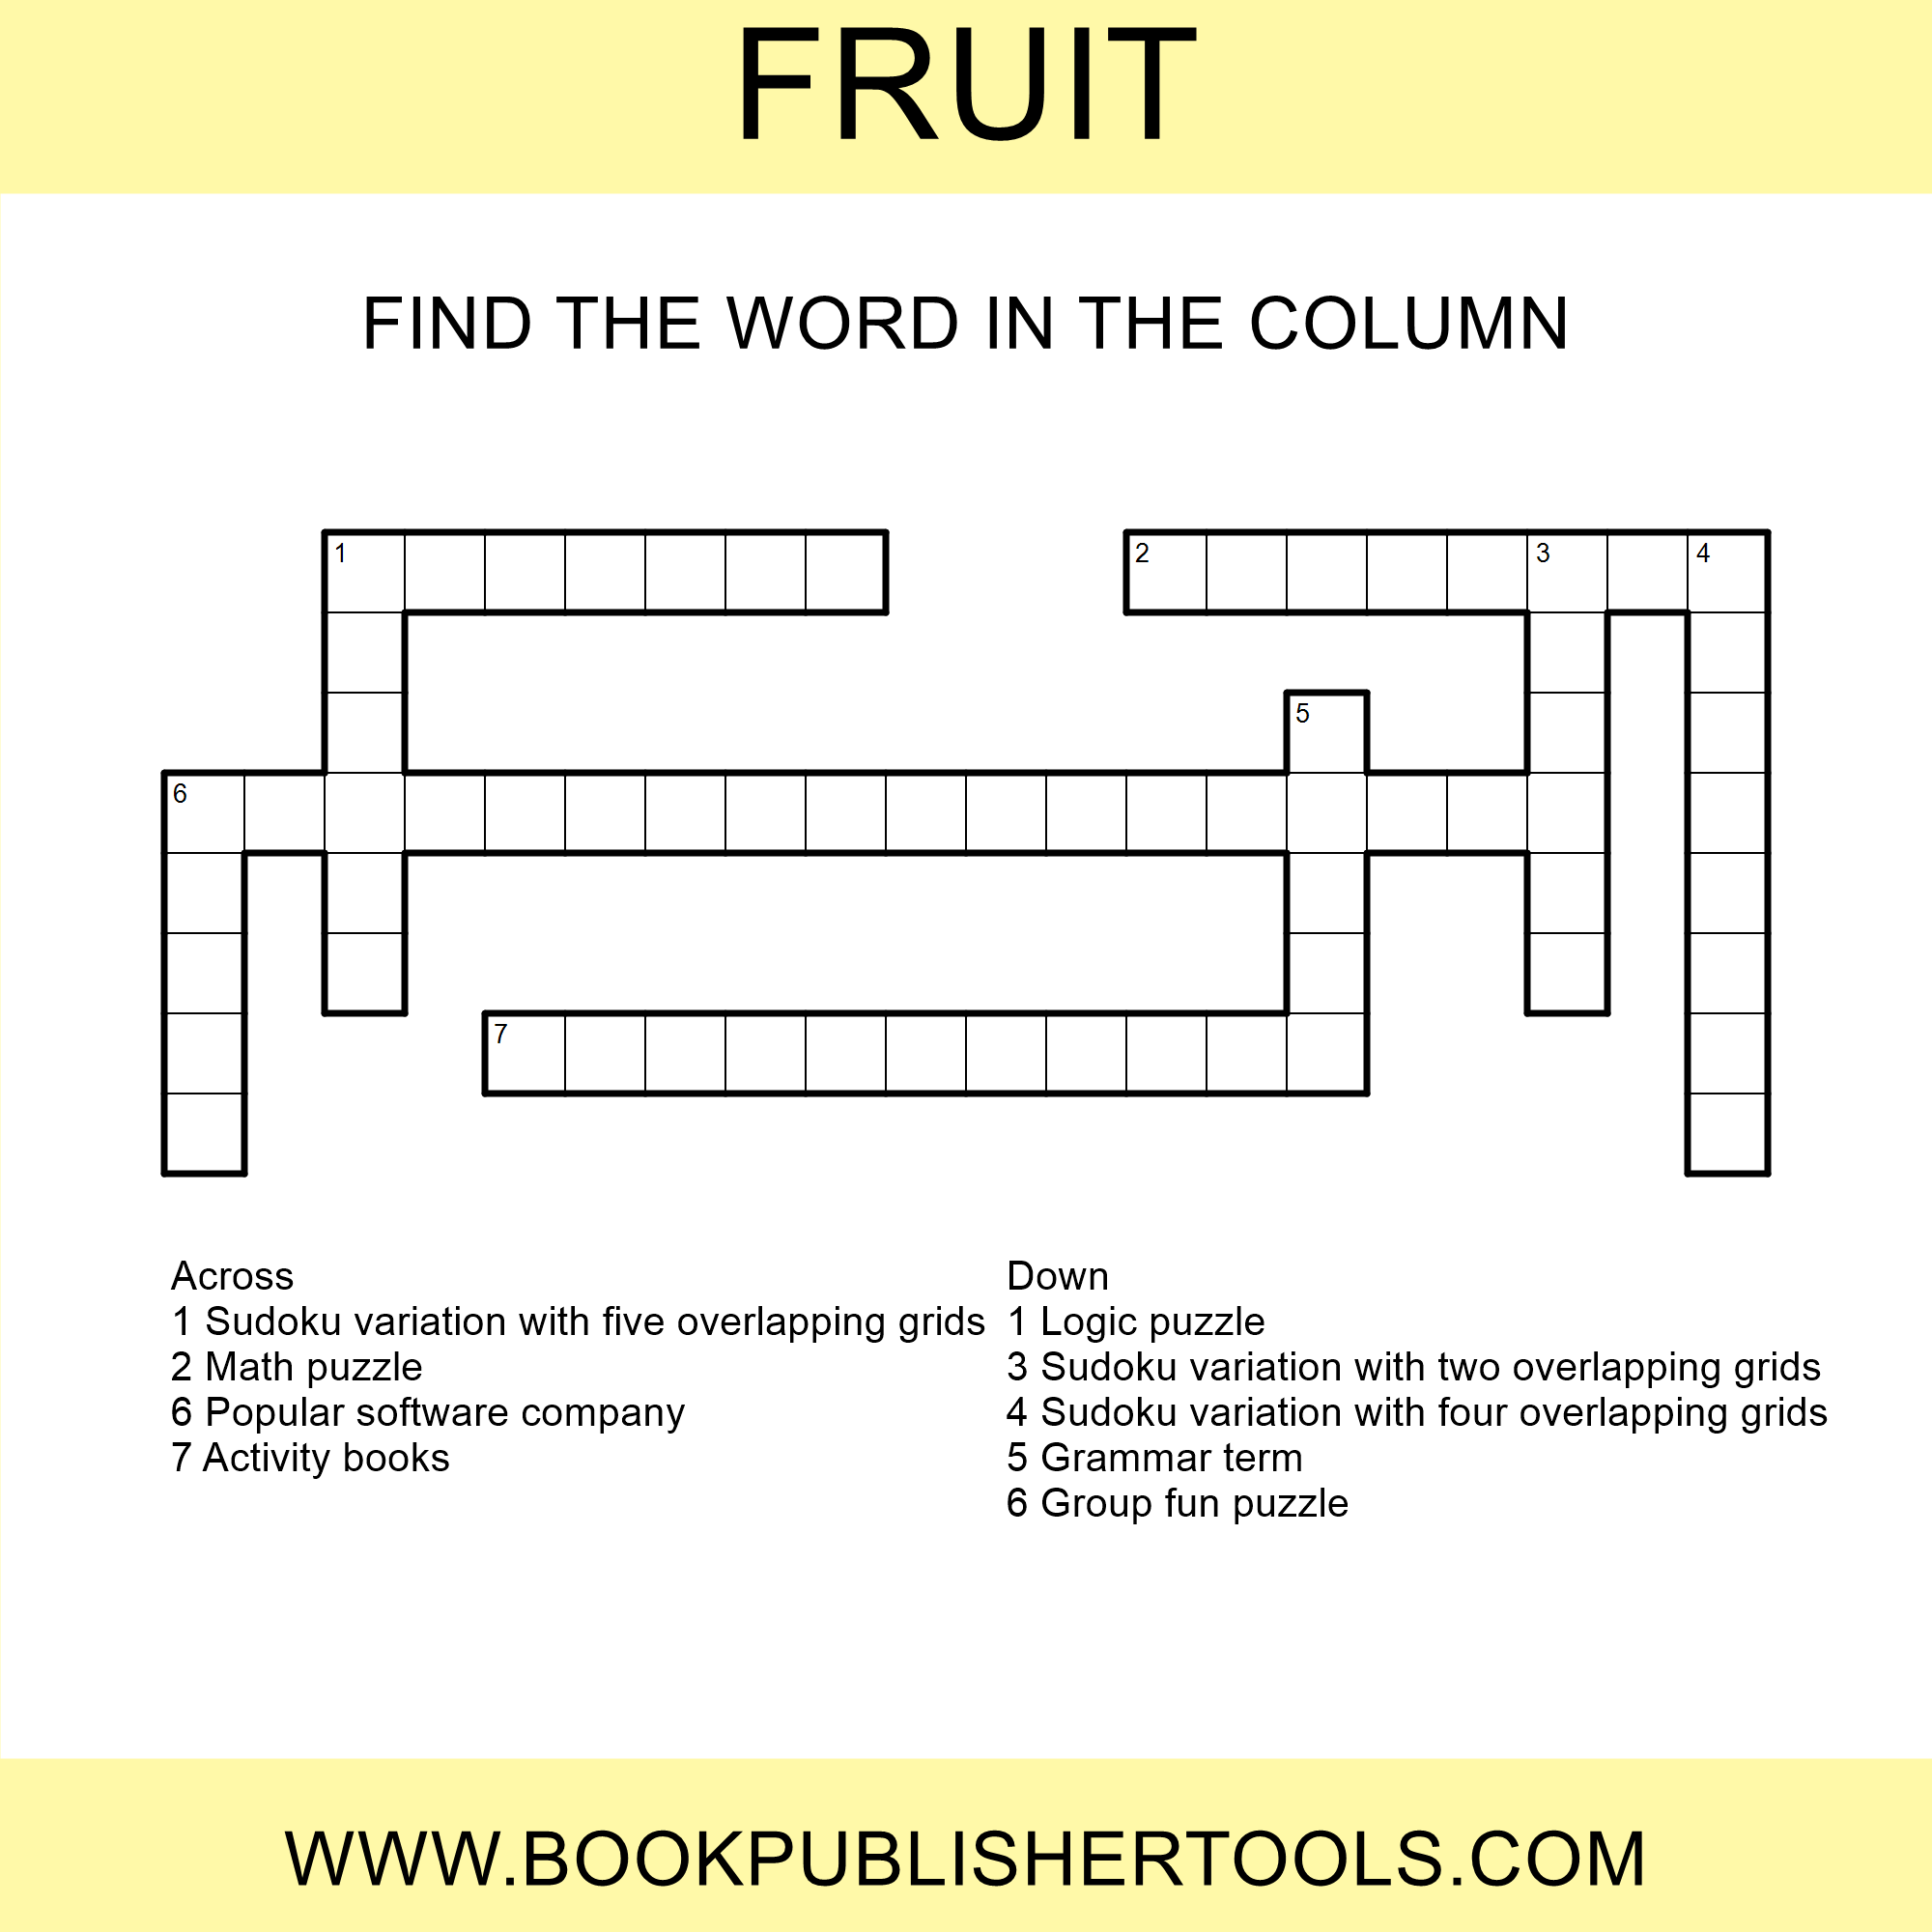
The additional 'Image' output was introduced to make it possible to create puzzles with an improved layout for social media or printables. To make this possible, we created an 'Image Settings' layout option that has all the settings for these images. Here's an example of what's possible (the puzzle in this image is a Criss Cross puzzle):
Setting the Title and Description
The title and description for this puzzle are part of the word list that's used for this puzzle, using the "#title" and "#description" options:

Editing the Image Settings
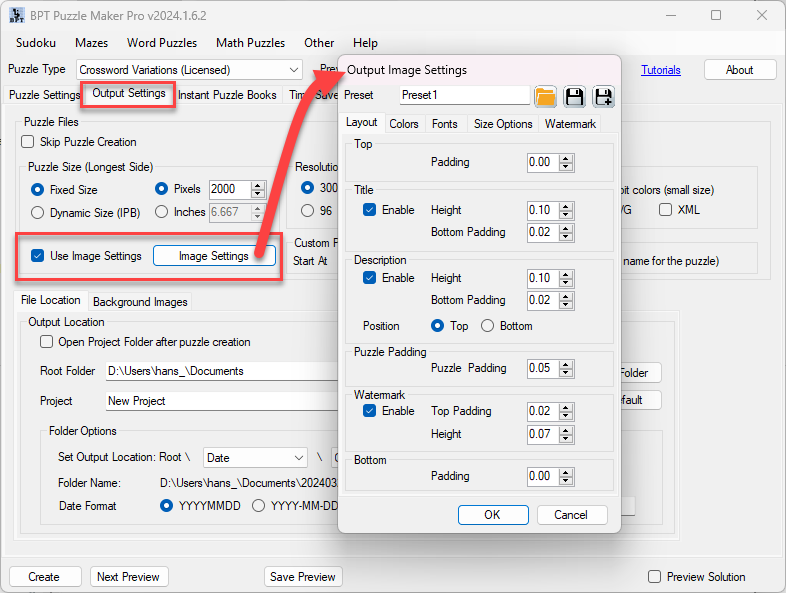
When a puzzle in Puzzle Maker Pro supports these new Image Settings, there is an option on the Output Settings tab to edit the settings:
In the next sections we'll explain all the different options for the Image Settings.
Layout Settings
The first tab has the Layout Settings. This is where you can enable or disable the different settings and add padding.
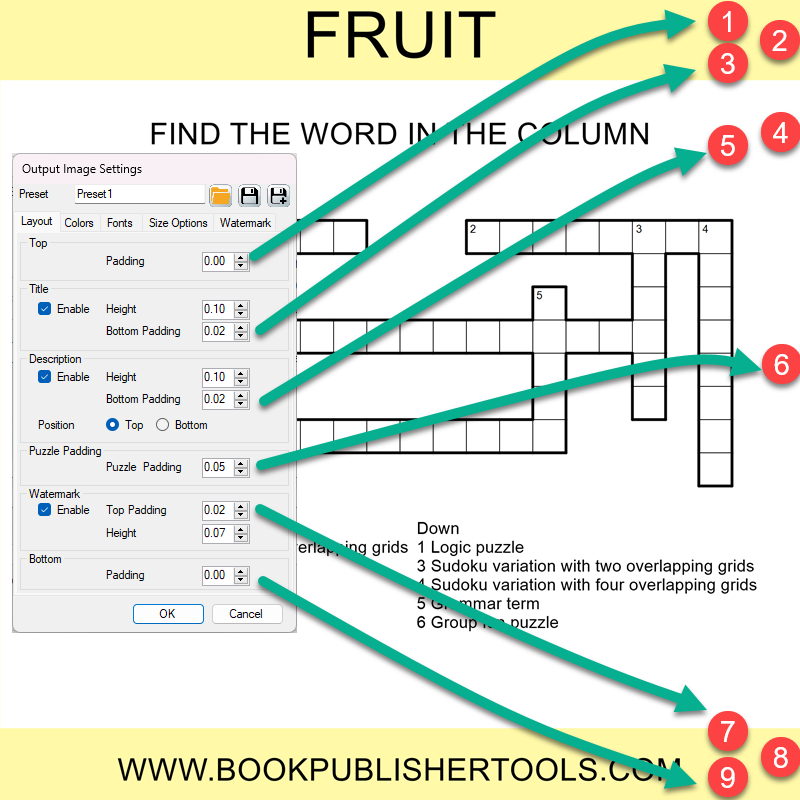
Padding and sizing is specified as a percentage of the total size of the puzzle. The exact size in pixels is calculated, based on the Puzzle Size.
- Top Padding - optional empty space at the top of the image
- Title Height - The font for the title will be adjusted automatically to make the text fit in the allocated space
- Title Bottom Padding
- Description Height
- Description Bottom Padding - The description can be placed at the top or at the bottom of the puzzle
- Puzzle Padding - empty space on all four sides of the puzzle, when it is added to the image. The actual empty space will also depend on the size and format of the puzzle. For example, when fitting a square puzzle in a rectangular space, there will be more white space on some of the sides
- Watermark Top Padding
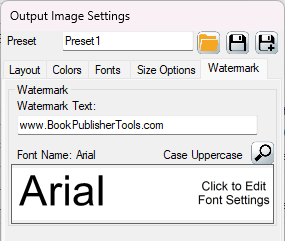
- Watermark Height - The actual watermark is set on another tab, by default it's set to "www.bookpublishertools.com"
- Bottom padding
You can enable or disable the different areas, depending on your styling preferences.
Colors and Fonts
You can set background color for the entire image (the canvas color) and the background color for the puzzle. (If the puzzle module has it's own canvas color settings, these will be used as well). Additionally you can add an outer border to the image.
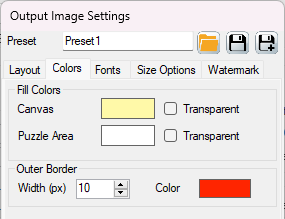
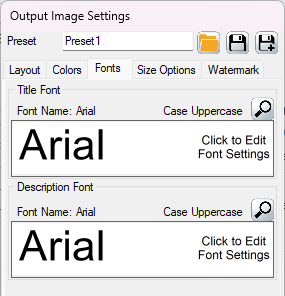
You can set the fonts for the Title, Description and Watermark. (The Watermark font can be found on the Watermark tab). The font name, color and case will be used when printing the Title, Description or Watermark in the image.
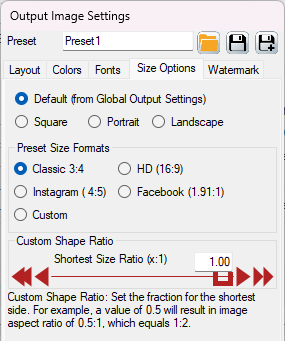
Size Options
By default the image settings from the "Output Settings" tab in Puzzle Maker Pro are used. You can override this by selecting one of the size settings on the "Size Options" tab. This allows you to configure specific size settings for your social media platform.
Watermark
The Watermark option allows you to add an url or brand name at the bottom of each image automatically. It's best to switch off the Watermark (on the Layout tab) when you are creating puzzle books, but it's a handy feature when you are creating images for social media.