How to create an Instant Puzzle Books with custom margin settings
In this tutorial we'll set up a puzzle book layout with different settings for left and right pages.
Step 1 - Set the puzzle options
In this example we'll work with Sudoku, which is one of the easiest puzzles to create - since there's no need to set up a word list or other input.
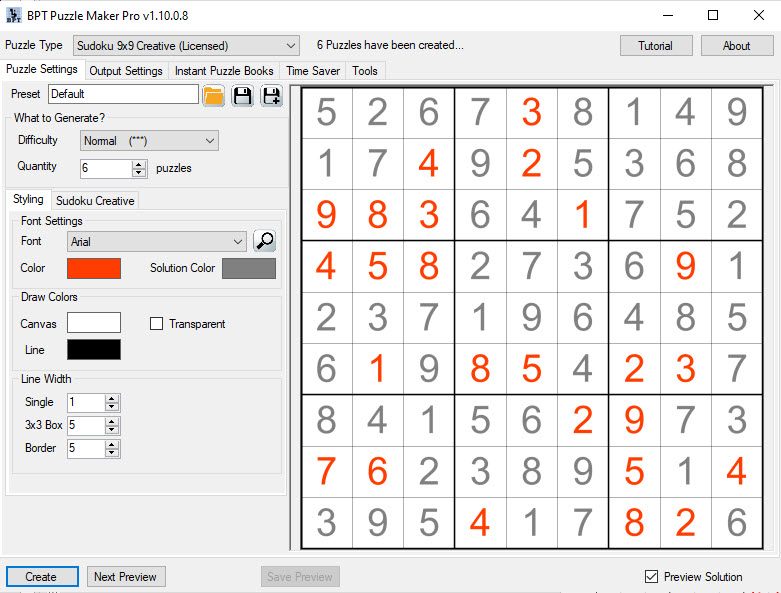
We'll create just 2 pages, with 6 puzzles in total, to illustrate the layout options.
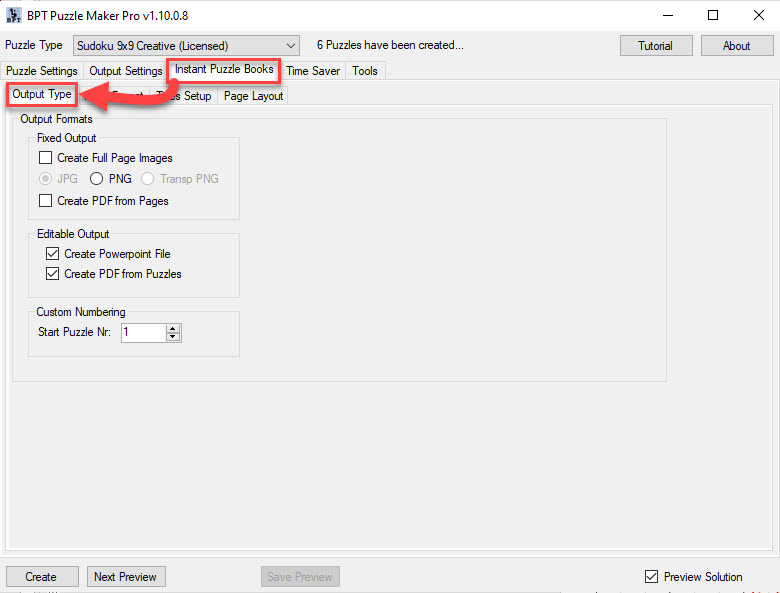
Step 2 - Set the Desired Output Type
In this case we'll create a Powerpoint file and a PDF.
Step 3 - Set up the Page Format
The next step is to set up the Page Format and the Margins.
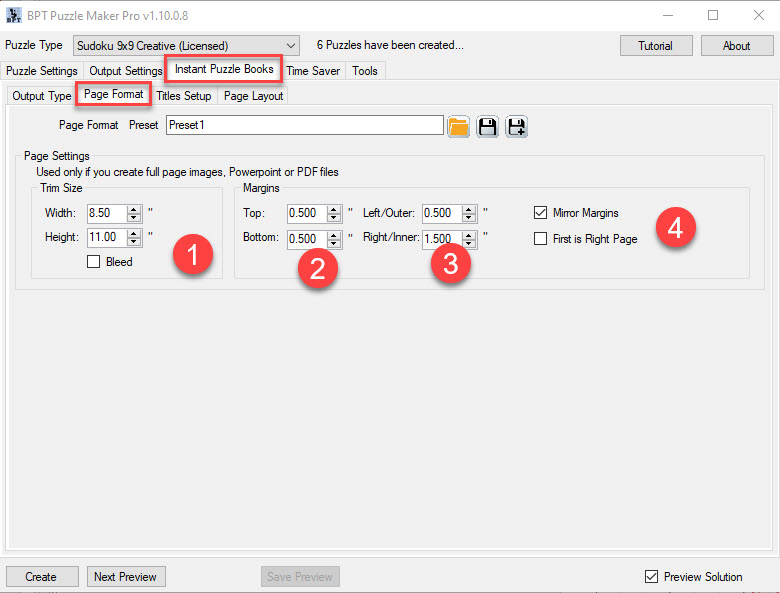
1 - The Page Format or Trim Size
In this example we'll set it to 8.5"x11". You can use any trim size you want. However, with smaller trim sizes and large margins, there will not be much space left for the actual puzzles and solutions!
(For puzzle books generated with Puzzle Maker Pro, there's no need to use Bleed, unless you set the margins to zero. Normally the puzzles will be placed within the page margins, and not in the margins and bleed area.)
2 - Top and Bottom Margins
You can set these as desired.
3 - Left/Right Margins
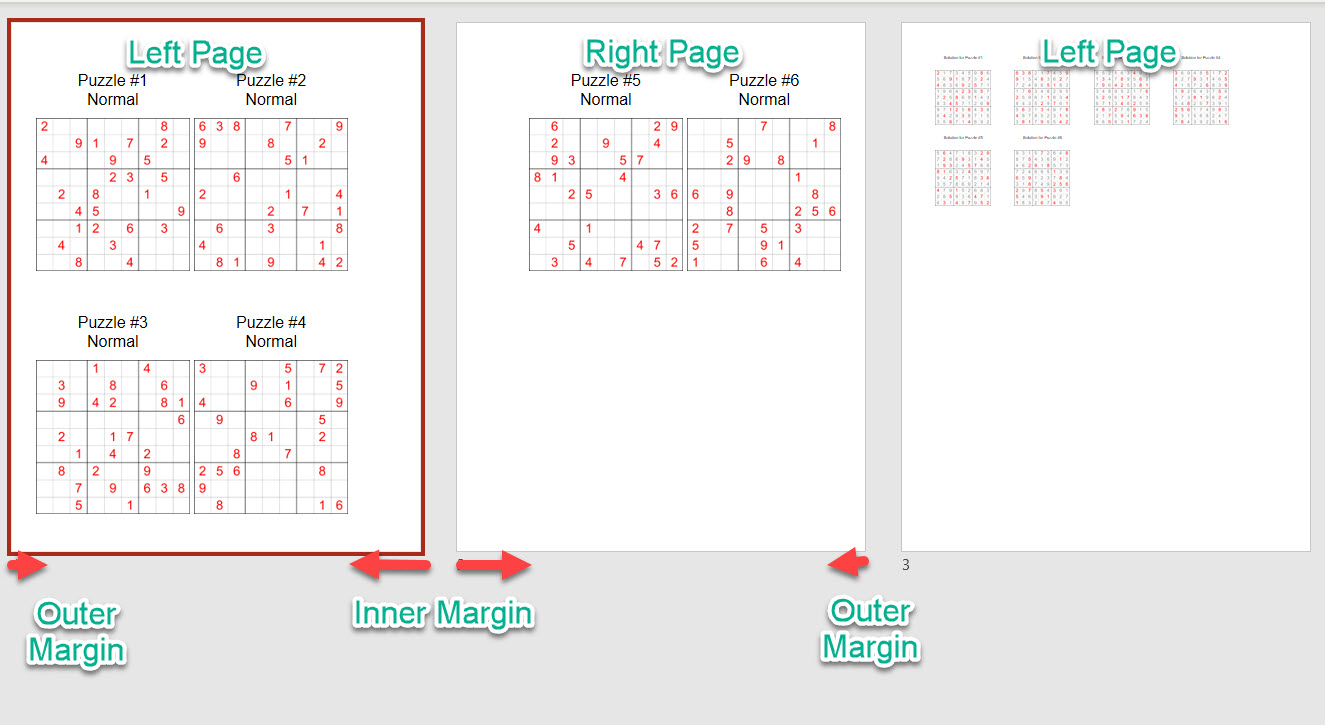
Let's say you want different margins for left and right pages, because you want a larger gutter margin. In that case the "Left" Margin setting is used for the outer margins (left margin on the left page, right margin on the right page), and the "Right"setting is used for the inner margins (right margin on the left page, left margin on the right page).
To illustrate this in the output, we'll set a really large inner margin of 1.5".
4 - Mirror Margins
By default, if you would create a PDF or Powerpoint file (that can be exported to PDF with Powerpoint), the first page would be a right page (the front cover), the 2nd page would be a left page, etc.
However, if you use different margins for left and right pages, it's important to specify which page is the first one. However, if the first page is not a 'right' page, you'll have to add a cover page to your PDF or Powerpoint file manually.
We select "Mirror Margins", and unselect "First is Right Page". That means the first page is a left page, and you'll have to add the cover page later.
These are the settings to create different left/right margins in your puzzle book.
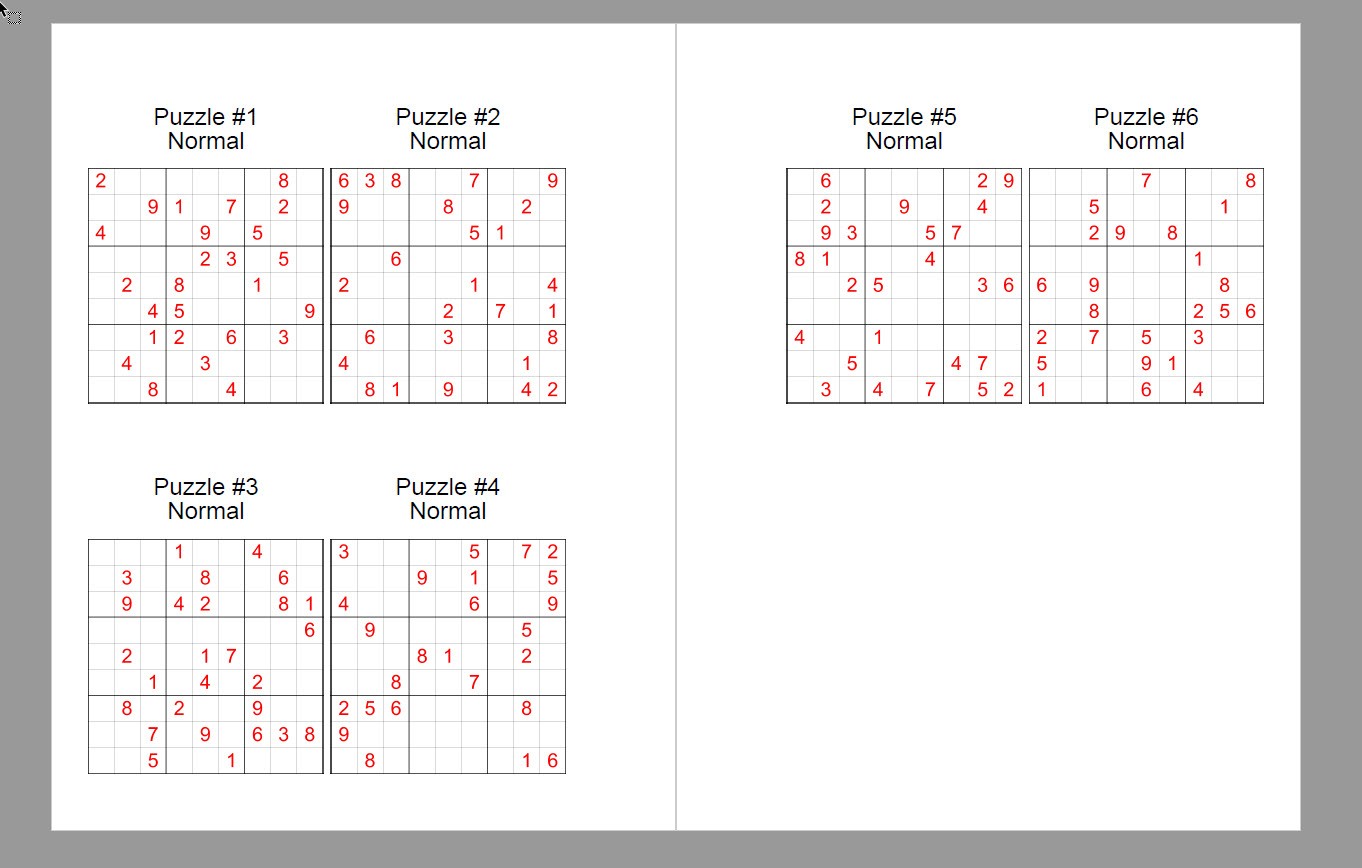
Step 4 - Page Layout
The final part to set up is the page layout:
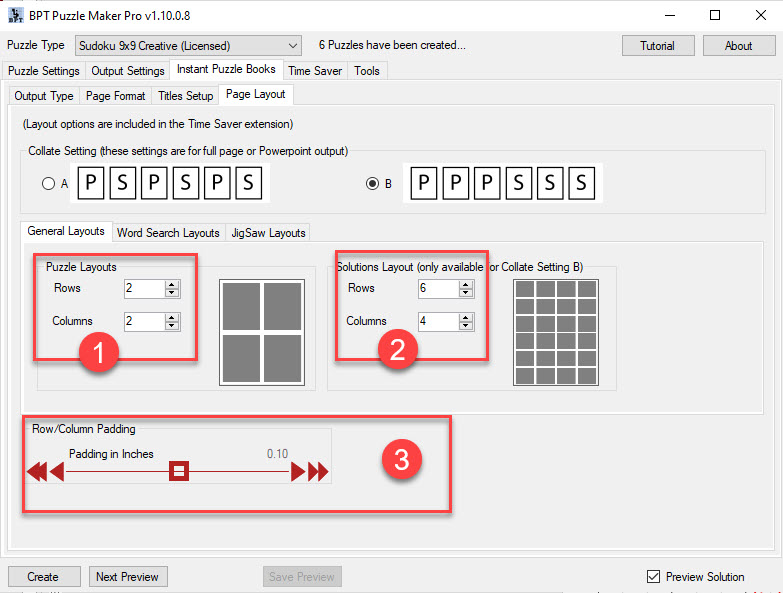
Here you can set the number of rows and columns for the puzzle pages (1) and for the solution pages (2).
In addition to that, you can specify the padding (distance) between the puzzles (3). In this case it's set to 0.1"
Step 5 - Create
After setting the different options and settings to your taste, click "Create". Puzzle Maker Pro will now create the puzzles for you, and create the Instant Puzzle Books from those puzzles.
Here are screenshots of the Powerpoint results (first image) and PDF results (second image, only two pages shown).