How to Preview and Export in Geometric String Art Designer
Preview and Export
The goal of creating a design in Geometric String Art Designer is to have an image of your design.
Canvas Size
On the "Settings" -> "Canvas Size" tab you can set the details for your canvas:
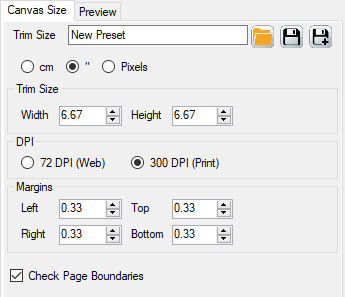
- Trim Size: the size of your image in centimeters, inches or pixels (internally it will be calculated in pixels, because that's how the size of JPG and PNG images is determined).
- DPI: Dots Per Inch. If you plan to use the images in books for KDP (or elsewhere) where commercial print settings are required, choose 300 DPI. Otherwise you can choose 72 DPI, which is still good for display and web use.
- Margins - set margins that will be kept empty
- "Check Page Boundaries" - this will always make sure that shapes are drawn within the margins. If you uncheck this, you can move shapes partly outside the canvas as well.
Save Project
Always save your project before exiting the software or resetting the design. This can be done at the top right (similar to the Preset options in Puzzle Maker Pro).

Just type the name, and click the "Save" icon.
Preview Options
Geometric String Art Designer has separate settings for the Preview and for Export. While previewing you'll probably want to see the shapes and margins, which you may not want to include in an export.
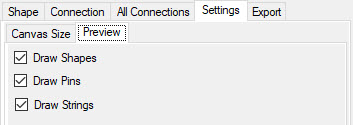
You can set the preview options on the "Settings" -> "Preview" tab. Current options are:
- Draw Shapes
- Draw Pins
- Draw Strings
The margin will always be shown in the preview.
Export Options
Select the "Export" tab to set the export options:

- Include Shape Outlines - whether or not to print the shapes.
- Include Pins - for string art designs you'll need to print the pins. However, if you want to print the image as geometric art, you don't need the pins
- Include Margin Lines - Usually not needed, but it's available, just in case
- Include Strings - Usually this will be included, but if you want to create 'pin art', you can omit the strings.
- Project Name
- File format - PNG, JPG or Transparent PNG
Export
To export your image, click the Export button at the bottom. This will use the current Export settings. You can select (or create) the folder where the file will be saved, and you can change the filename as well.