How can I create Nonogram puzzles with Puzzle Maker - Nonogram Standard?
This tutorial shows how to create nonogram puzzles with Puzzle Maker - Nonogram.
The techniques in this tutorial apply to:
Creating Puzzles
You always start off with a blank screen. If you've activated your software (Instructions for this appear are sent in an email automatically upon purchase), you can start making your own puzzles.
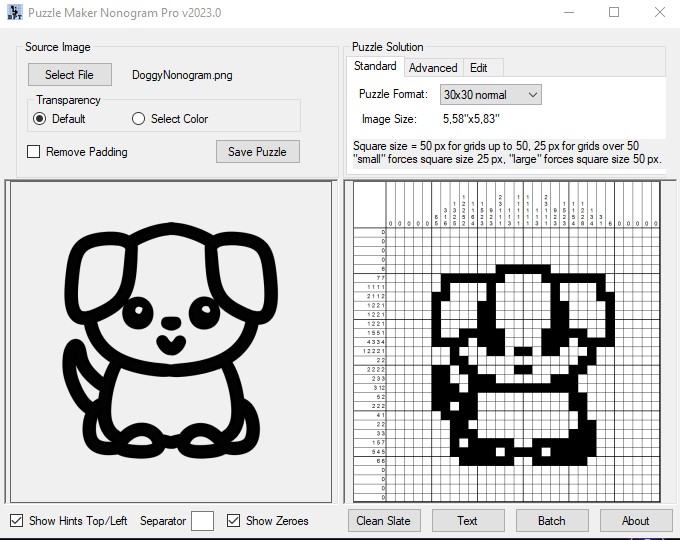
You can select a file with the "Select File" button, and a preview of the puzzle/solution will be shown in the panel at the right. The original image is shown at the left. (The actual puzzle isn't shown, since this resembles the solution, but without the black squares.)
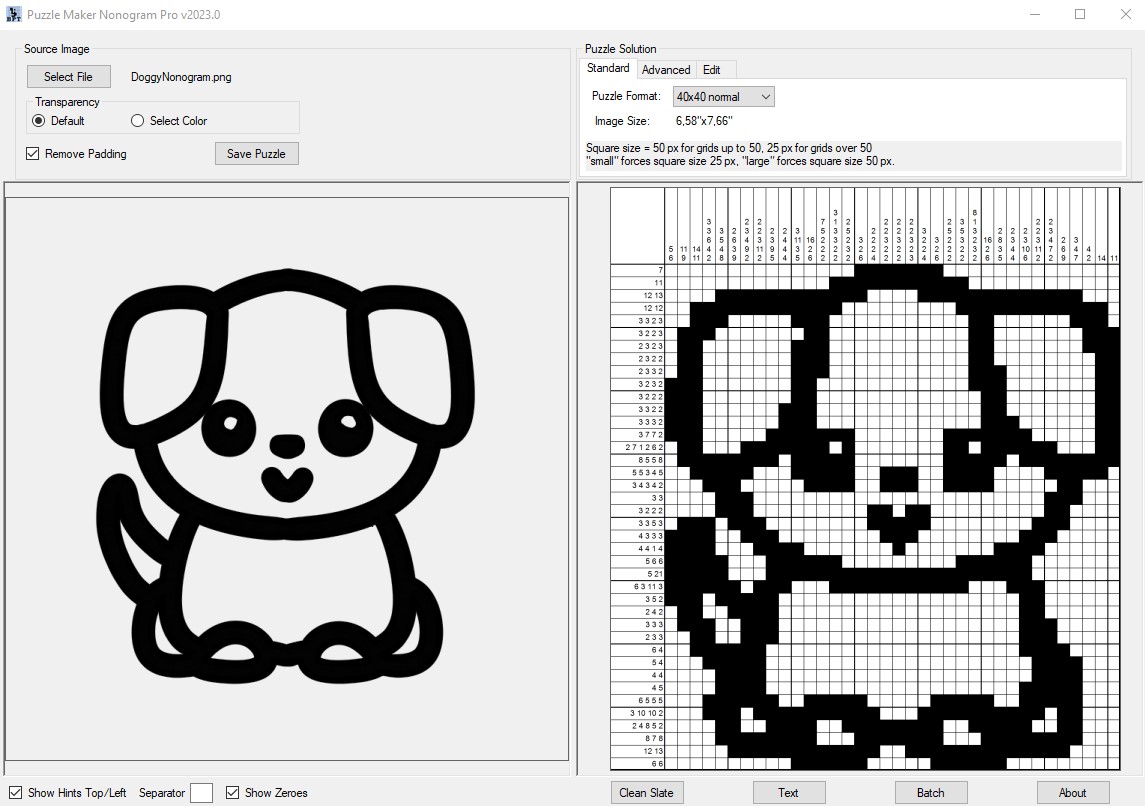
There are several ways to further customise and finetune the puzzle:
- Select the Puzzle Format. There are further options for Small or Large, that will impact the final size of the puzzle.
- You can choose where the hints are shown. Top/Left is automatically selected, if you deselect this the hints will go bottom/right.
- You can add a separator. This will appear between the numbers on the left, to make the guide easier to read.
- You can choose to show zeroes. If you uncheck this box, the rows without any solution will not have any numbers.
- Remove Padding. This will remove all empty rows, and redraw the puzzle. If you have a puzzle with a large amount of white space on the edges, this could make more detail show up in the puzzle. However, this option can also change the amount of rows and columns that appear in the puzzle. For further information on how to avoid this, you can look up our Advanced Nonogram Editing tutorial.
We have used several of these options, which leaves us with this puzzle for now.
For further tutorials, you can check out: