How to select images for your puzzles in Puzzle Maker Pro?
Several Puzzle Maker Pro modules, like Sudoku 9x9 Creative, Sudoku Kids Edition and Sudoku Variations, Bingo and Game Maker, allow you to use your own images (cliparts) as symbols in a puzzle.
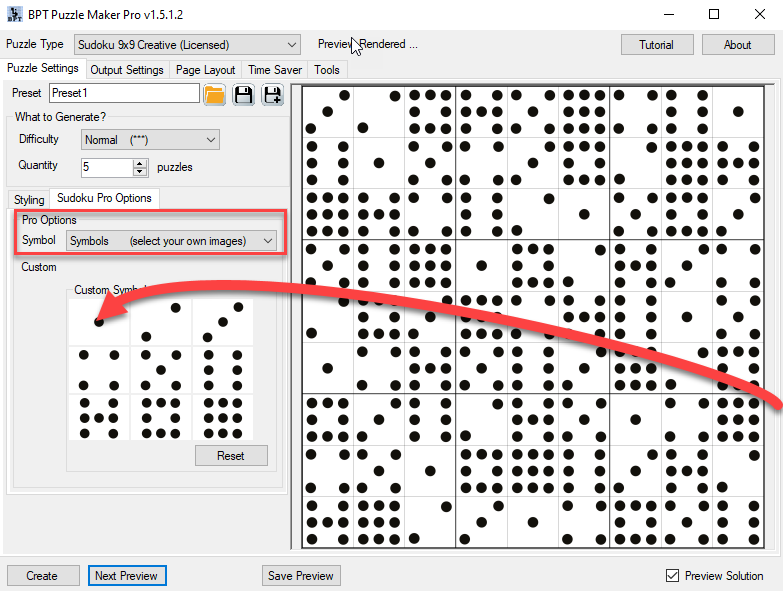
In this tutorial we will use Sudoku 9x9 Creative as an example. In other modules it works the same, although the option may have a slightly different name.
Preparing your images for use in Puzzle Maker Pro
To use images in Puzzle Maker Pro, they need to be stored on your computer in PNG or JPG format.
Puzzle Maker Pro will reduce the size of the images when they are too large, but will never increase the size. Increasing may result in blurred lines or edges, reducing the quality of your puzzles.
In most cases images can be quite small, this depends on the puzzle size and puzzle type you are using.
The puzzle type defines how many images will be put next to each other horizontally or vertically. For example, Sudoku 9x9 will use 9 images horizontally and 9 images vertically. Sudoku Kids Edition will use 4 or 6 images in each row or column.
A quick example: Let's say you create a Sudoku 9x9 puzzle, the puzzle size is set to 1800 pixels. 1800 pixels at 300 DPI means a puzzle size of 6".
Since there can be 9 images in a row or column, we can easily calculate the minimum size for each image: 1800 divided by 9 is 200. That means the images you use can be as small as 200 x 200 pixels, and still create a fairly large puzzle.
Another example: A Sudoku Samurai puzzle has 21 x 21 squares. If we create a puzzle of 2100 pixels (7" x 7" at 300 DPI), each square will be 100 x 100 pixels. Which is also the size at which your images will be printed in the puzzle.
Note 1: The puzzle sizes in the examples were chosen to make the calculations easy. However, if you will use the puzzles in a puzzle book - for example on KDP - you'll still be limited by the available trim sizes. Even for a large 8.5"x11" puzzle book, the maximum width for the page content is only 7.5", if you use 0.5" margins. 7.5" equalis 2250 pixels at 300 DPI.
Note 2: Even though Puzzle Maker Pro will resize the images to make them fit in smaller squares, this will take processing time. In other words, creating puzzles and puzzle pages will take longer if large files have to be imported and resized to fit.
How to use your images in Puzzle Maker Pro
There are two ways to select the images you want to use:
-
Click the little image panel to open a file selection window (the same 'dialog' you'll see in most other Windows apps), and select the file you want to use for that panel;
-
Use drag and drop to select multiple images at once.
How to use drag and drop to import your images to Puzzle Maker Pro
It's easy to use your own images: Just drag the images from your file explorer, and drop them onto one of the little image panels (where the domino tiles are shown).
You can select one or more images, click the left mouse button on one of them, and then move the mouse (while keeping the button pressed) to these little image panels, and let go of the mouse button. The images will be used, for one or more panels, starting at the panel you pointed at.