Using the Mask Editor for Mazes 2D Tiles
With the Masks Add-On for Mazes 2D Tiles you can create mazes in any shape you want.
This add-on supports three separate styles of mask creation:
- Quick Masks
- Creating Masks using a silhouette
- Creating Masks Manually
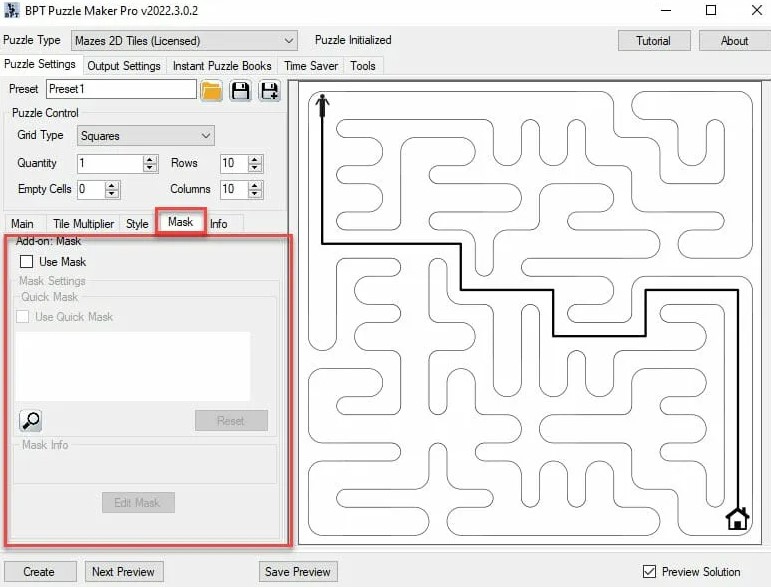
To use a mask, the first step is to select the "Use Mask" checkbox. This will let the software know that you want to use a mask. It's also possible to unckeck this, to turn off a mask you've set up.
Whenever you switch the Grid Type, the masks will reset. You can't use square masks on isometric grids and vice versa.
Quick Masks
The easiest and quickest option to create a mask is the aptly named Quick Mask option.
To use this, you'll need to select an image. Either by clicking the white panel below the "use quick mask" checkbox, or by dragging your image onto that panel.
Next, click the "Use Quick Mask" button, and click "Next Preview".
When you do this, several outcomes are possible:
- you get a shaped maze, as shown in the example above.
- Nothing happens.
- You get a result, but the result is... underwhelming.
After the Quick Mask is generated, the "use Quick Mask" checkbox will be unchecked automatically. Generating a mask from a bitmap takes time, and you may not want to generate the same mask over and over while you're adjusting style settings or selecting different tiles to use.
However, if you want to create a new mask with the Quick Mask feature, because you've changed the grid size or the image, you can check this checkbox again.
Nothing happens
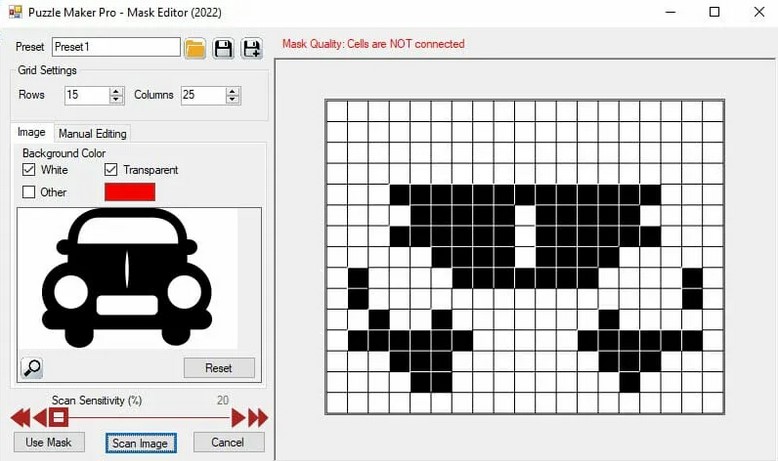
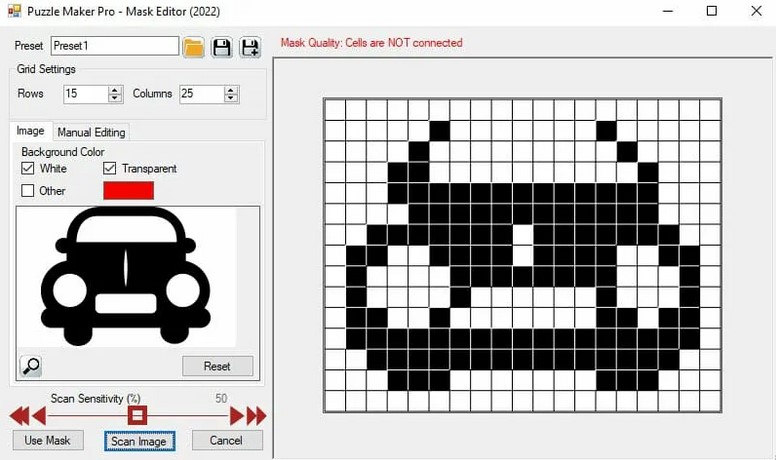
The Quick Mask option will try to generate a mask using the grid settings and the image you have selected. It will do so by analyzing the silhouette image, and varying the "Mask Sensitivity" until a 'Connected Mask' is created:
- Mask Sensitivity: The threshold for background pixels in each cell (square or isometric). If there are more background pixels than that threshold, it will be excluded. If there are fewer background pixels, it will be included in the mask. The Mask Sensitivity starts at 50%, so 50% of all pixels have to be foreground, and will go up in little steps to 80% foreground.
- Connected Mask: To create a maze, all the cells in the grid must be connected. When you use a mask that results in groups of cells that are not connected, it will not create a valid mask.
If there is no connected mask at the highest mask sensitivity (so 80%), the Quick Mask generator will give up, and there will be no mask.
Underwhelming Quick Mask results
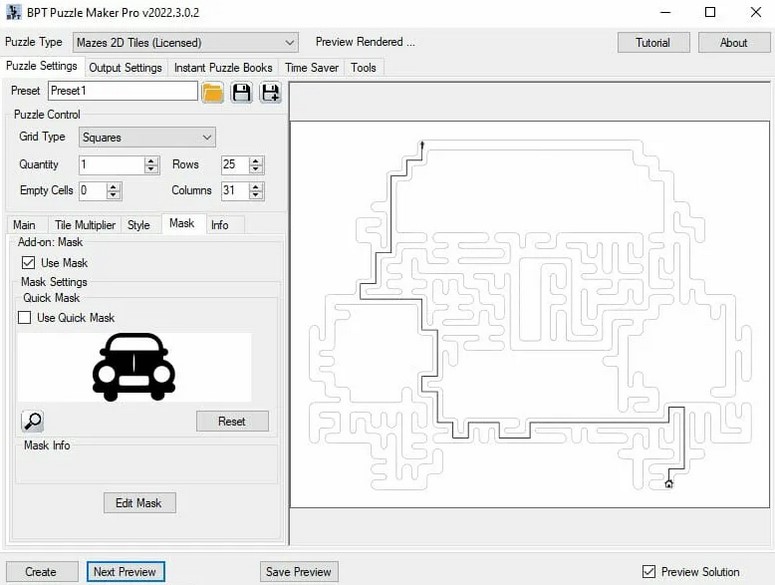
In many cases, especially when you're new to creating masks with the Mask Add-On, the result may be a bit underwhelming, or not look how you expected it to. An example of this can be seen below.
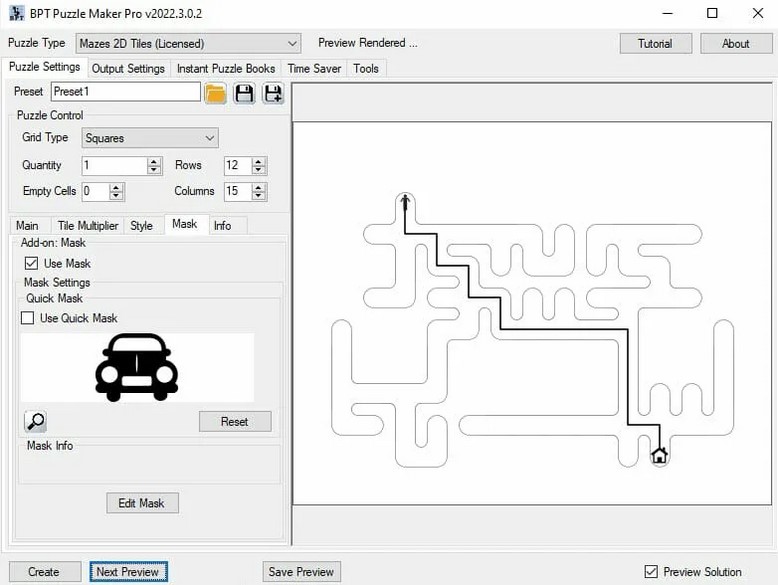
Even though we started with the silhouette of a car, and a mask was generated, the resulting image and the maze don't really resemble a car. This is not a bug: the mask generator did what it was supposed to do - each cell that has enough coloured (in this case black) pixels has been added to the maze.
What happened here is that the grid is too small for the image used. The top of the car has thin lines, and in a 12 row puzzle, they're too thin to fill up more than 50% of a tile. As a result, the roof of the car, and the top of the headlights, did not become part of the mask.
To avoid these situations, we recommend changing the numbers of rows for the grid. This should create a better mask.
Creating Masks using a Silhouette
To create a mask from an image, you'll need an image that can work as a silhouette: you can set which background colour(s) aren't part of the mask, and all other colours will be part of the mask. The masks feature won't work well with images that are only line-art.
When you click "Edit Mask" you'll see the mask editor.
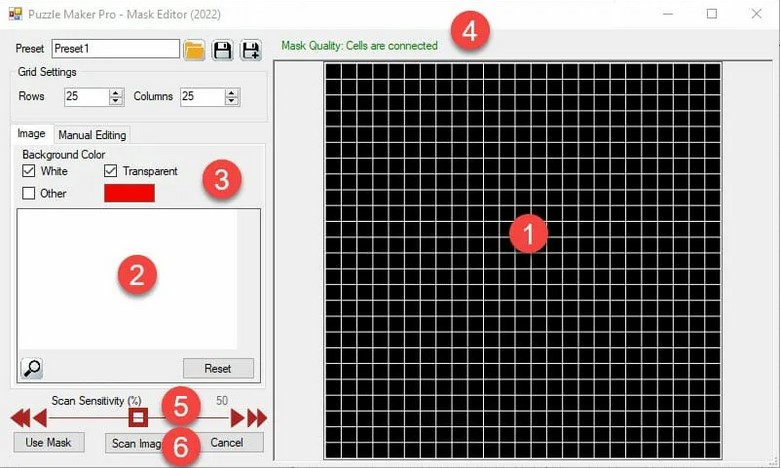
- The mask. If you already had a mask selected, it will be shown here. Otherwise, all cells will be part of the mask.
- The image selection panel. You can click here to select an image, or drag and drop an image onto the white panel.
- Depending on the image you're using, you may need to adjust the background colour.
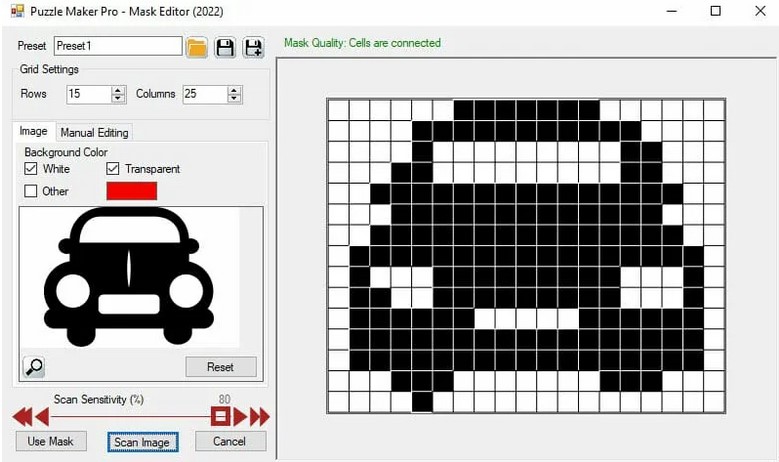
- Status of your puzzle. If it's green "Cells are connected", it's a valid mask for a puzzle. If there's a red warning, that means not all cells are connected to each other.
- After selecting an image, you can change the Mask Sensitivity to create a better result. This is the same setting that Quick Masks uses.
- After changing the grid size or Mask Sensitivity, you can click the "Scan Image" button to create a new mask from the current image (in 2.). This will overwrite all manual changes you may have made.
You can toggle each square (or tile) in the mask by clicking on it, or by using advanced editing options:
Setting the Background Colour
For regular silhouette images, the background will be either white or transparent. You can select a different colour, or even switch the foreground and background for a silhouette. There are checkboxes for white, transparent, and a custom colour, so you can exclude up to three colours from your mask.
Changing the Mask Sensitivity
The mask sensitivity is the threshold for background pixels in each cell. If there are more background pixels than that threshold, it will be excluded from the mask. If there are less, it will be included. You can manually adjust the threshold to create slight differences in the mask.
Below are three examples of different Mask Sensitivity settings:
Editing your Silhouette Image
Prepare your image before you use it as a mask. Photo editing software and drawing software are great tools to do some pre-processing of the silhouette images:
- Reduce the number of colours, especially if the background is not one single colour. In Adobe software, there is an option called "Posterise" to do this.
- Trim black or transparent borders from your image, because these will result in unused rows/columns of cells in the mask and the maze.
Creating Masks Manually
Clicking on the "Manual Editing" tab reveals the advanced editing options:

- Action: Toggle will switch the colour from black to white and vice versa. This will include or exclude the cell or range from the mask. Copy color will copy the colour of the clicked cell to all the cells in the range.
- Range type: When you click on a single cell (Tile) you can select if your actions will affect the cell, the row, or the column.
- Range Size: Adjust 1, 3, or 5 cells, rows, or columns at a time.
The screenshot shows the result after two mouse-clicks:
- Click on a cell with action "toggle", range type "row", and range size "3"
- Click on a different cell with action "toggle", range type "column" and range size "3"
You can see that by using Toggle, some of the white cells in the row have turned black again. By using "Copy Color" you can prevent this from happening.
Note: Clicking the cells for editing is somewhat sensitive. If you move the mouse while clicking, the software won't know if you want to move or click. If you're zoomed in, you can also click and drag the image, to have a closer look at the part you want to edit.
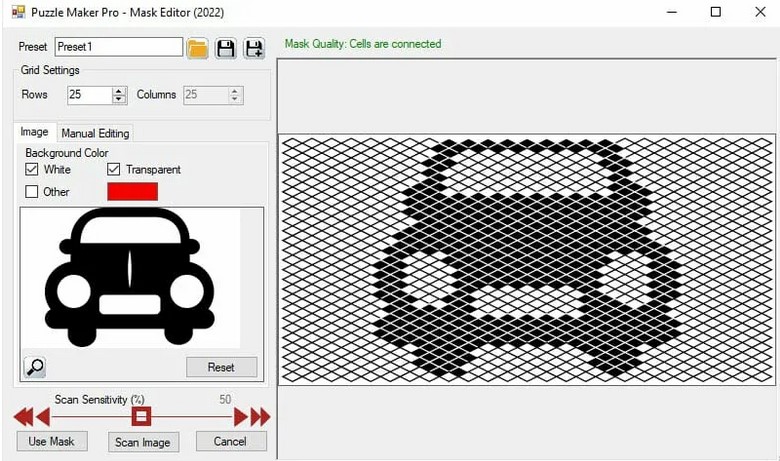
Masks for Isometric Mazes
You can also use the Mask Editor for Isometric Mazes. It will work the same way, but the tiles will have a different shape.
When you create masks for isometric grids, there are some unique features to pay attention to:
- The classic Isometric grid has a diamond shape. That means that any part of the silhouette that's in the corners of the image will not be used.
- The full square isometirc grid type was created to prevent that problem. However, by nature it's a rectangle, which means it will work best with rectangular silhouette images. In the screenshot above you can see a lot of unused cells at the left and right side of the mask. This doesn't have to be a problem for your maze, but it's something to keep in mind.