Getting Started with Mazes 2D Tiles
Puzzle Maker Pro – Mazes 2D Tiles is a maze generator to create mazes with your own tiles. Tiles are PNG images with a set format and naming convention. (See also the tile format and conventions tutorial). We have included a default tile set with the software for both isometric and square mazes. However, we also encourage you to create (or buy) and use your own tilesets, to create mazes that are uniquely yours.
Overview
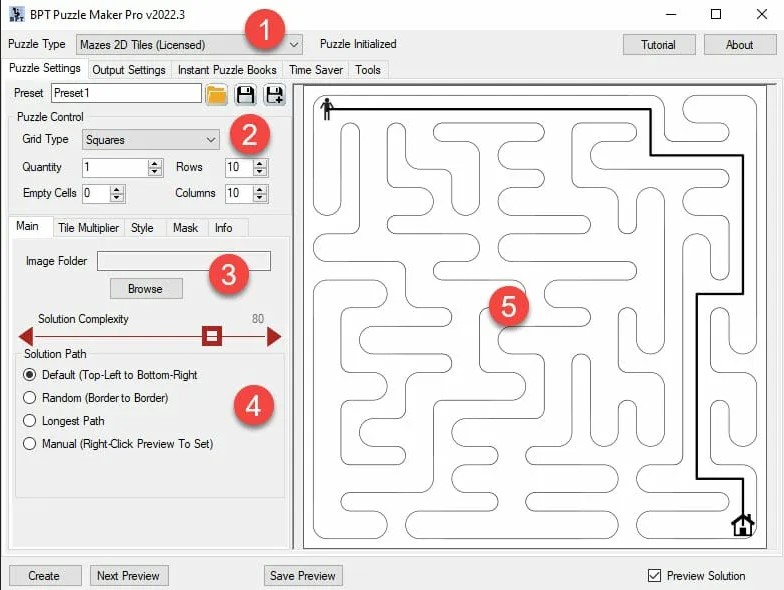
The screenshot above shows several things:
- The puzzle select screen. You can select the type of puzzle you want to make here.
- Grid Type. You can choose between Squares, Isometric Classic, or Isometric Full Square. For the differences between the two isometric styles, we recommend you check out our tutorial: Create Isometric Mazes with Mazes 2D Tiles
- The Image Folder is where you can select a folder, using the "browse" button. You can use this to import your own tilesets. Puzzle Maker Pro is installed software, so you don't need to upload your images to use them.
- Maze generator settings, to control how the maze is generated, and where the Start and End points will be located.
- Preview window. This is where you can see a preview for the maze you are currently generating.
You can also see 5 tabs for this puzzle type
- Main: this is what you're seeing in the screenshot
- Tile Multiplier: An Add-on that will complete tilesets from only 5 or 6 base tiles. It can also generate isometric tiles from square tiles. We also have a tutorial on how to use the Tile Multiplier Add-on.
- Style: Colour and line width settings for the solution path
- Mask: Using masks to create mazes in custom shapes. You can use your own silhouette images to create masks, and then edit or finetune the masks.
- info: Here you can see license information for this Puzzle Maker Pro module, including add-ons.
Setting up your maze
Puzzle Size
You can select the number of rows (horizontal) and columns (vertical) for your maze. Both have a mazimum of 100. We chose this maximum because of multiple reasons:
- We want to keep the appearance of your tiles intact. If you print too many tiles on a small surface, details could be lost.
- Each tile image has to be 'printed' on the maze image. Using larger puzzles will take more time to generate.
However, if you really want larger puzzles, feel free to contact us, and we can see if a larger upper limit is possible.
Empty Cells
You can add empty cells to the maze. Depending on your tile set, these tiles will be actually empty, or you can add specific tiles for these empty cells. For example, if you create a maze with road style tiles, you could add houses or small lakes in the empty cells. Note: an empty cell is different from a cell that is removed with the Mask Editor, in the latter case the cell is not drawn at all.
Quantity
Finally, there's an option to set the quantity. This is the number of mazes you want to generate when you click the "create" button. The puzzles will be saved in the location you set up using the Output settings in Puzzle Maker Pro
Selecting the Tiles Folder
To select the Tiles Folder, click the "browse" button, and navigate to the folder where you have stored your images. Select one of the images, and click "open". This will automatically select the entire folder of images.
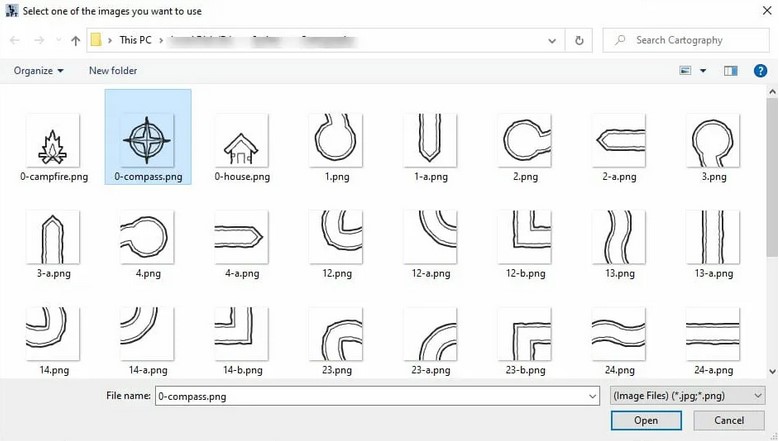
The pack shown here is a free Cartography Tiles Pack from Kenney. As you can see, we've renamed the files, with each file now starting with one or more numbers. The numbers indicate the sides of the square that are connected, with 0 having no connections, 12 meaning side 1 and 2 are connected, et cetera. For more information, you can always look at our tile format and naming conventions guide.
Note: The tiles used in this preview are only 64 by 64 pixels, meaning they have to be upscaled if you want to use them in a maze.
After selecting this set, and clicking the "preview" button, you'll see something like this:
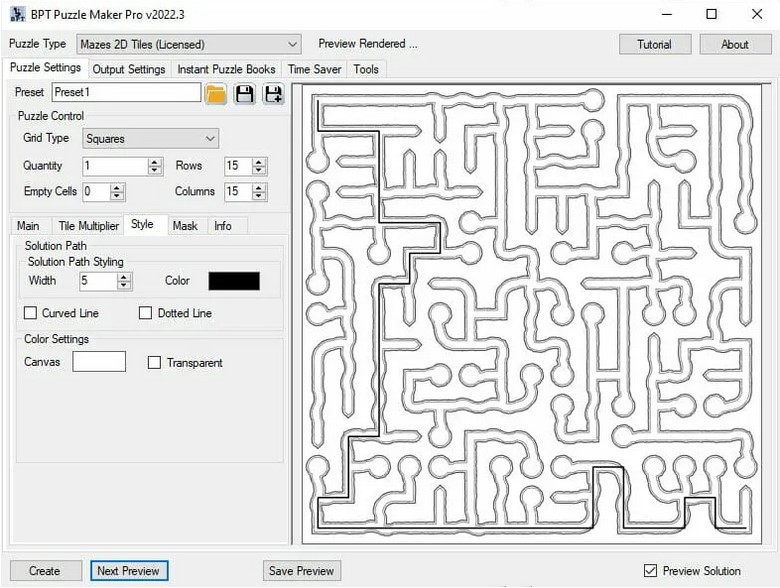
The straight black solution line looks out of place in this maze style, so let's change that up a bit.
Style
The screenshot below shows the style settings for Mazes 2D Tiles
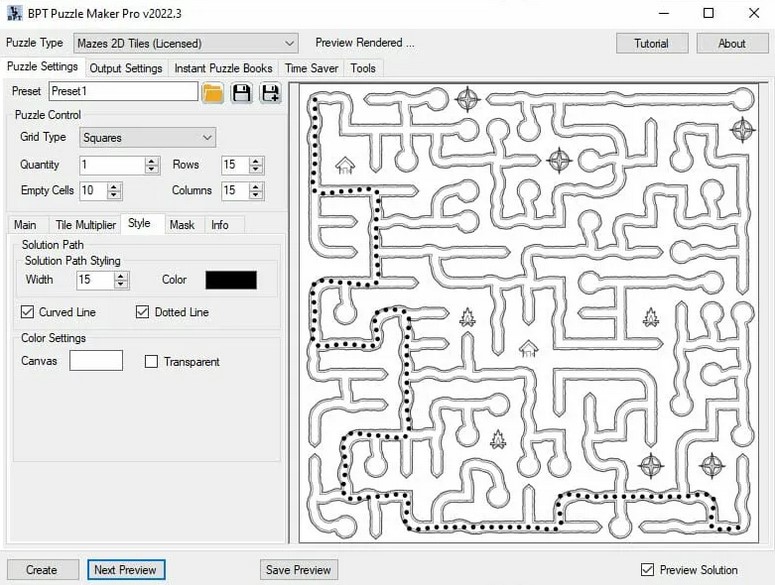
There are several options to customise the way the solution path is drawn:
- You can change the width and colour of the solution path. Here we changed the width to 15. The width is a percentage of the square, so when a maze gets drawn the width of the solution path will now be 15%.
- Curved line: This will uze Bezier curves (if you've used Adobe Illustrator, Photoshop, or Affinity before, you may be familiar with these already), to make a curved line. The line will go through the center points of each tile.
- Dotted Line: Instead of a single continuous line, you can also create a dotted line. We have chosen this style because it fits the general style of the puzzle more.
In addition to these options, you can also change the canvas colour. We haven't changed that setting here, because the tiles themselves have transparency as well. Last but ont least, we've added 10 empty cells, which are filled with the '0' images.