How to use the Manual mode in Easy Puzzle Books (plugin for Powerpoint)
This tutorial explains the Manual mode in Easy Puzzle Books (plugin for Powerpoint)
Overview of the Manual process
The "Manual" way of creating puzzle books consists of a number of steps:
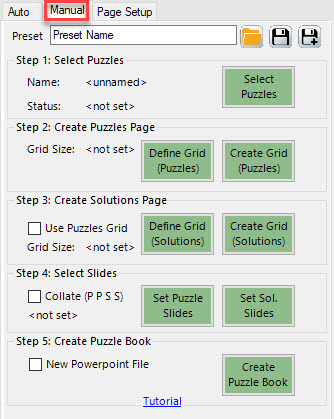
Some of the steps are identical to the "Auto" approach, some are different:
- Select Puzzles - Select puzzles and solutions (identical), and set up the placeholder codes for the puzzles (optional)
- Create Puzzles Page - Set up the grid (identical), and Create the Puzzles template slide (new)
- Create Solution Page - Set up the grid (identical) and Create the Solutions template slide (new)
- Select Slides (New) - Select which template slides to use for puzzles, and which for solutions
- Create Puzzle Book - (identical)
Step 2 and 3 include creation of the template slides, and manually editing (changing) them. This diagram illustrates the steps.

Placeholders
Part of this process is creating "Placeholders" that will be replaced by puzzles and puzzle titles later. There are three steps that affect the placeholders. For Easy Puzzle Books this is mostly automatic, because there's only one puzzle type involved. The three steps are shown in this diagram:

- Set up Puzzles - As part of the puzzle setup, you can specify the specific placeholders for the puzzle. There are four different placeholders: Puzzle, Puzzle Title, Solution, Solution Title. Each of these will be used in the template that you can edit.
- Create Grid - A new slide will be created that contains placeholders for the puzzles, solutions and titles.
- Create Puzzle Book - Will create as many copies of the template slides as needed, and replace the placeholders with the actual puzzles, solutions and titles.
The diagram below shows examples for the different steps. We'll cover all of these in detail.

Set up Puzzles - Placeholders
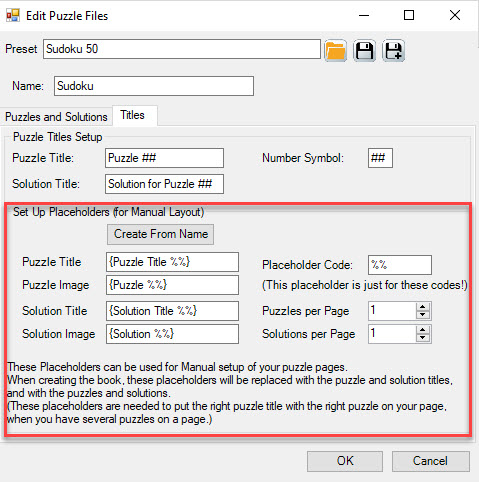
The tab "Titles" in The Puzzle Setup window will let you edit the Placeholders. As you can see, there are four of them, Puzzle (Image), Puzzle Title, Solution (Image), Solution Title. These are the four different items that will be placed on your puzzle pages.
There's a "Placeholder Code" which is set to "%%" by default. However, if you need to use "%%" in your titles, you can set it to a different value.
You can also set the number of Puzzles per Page and the number of Solutions per Page. For example, if you want to create a 2x3 puzzle grid, you'll have 6 puzzles and 6 puzzle titles on a puzzle page.
To keep track of which title belongs to which puzzle, they are numbered: {Puzzle Title 1} belongs to {Puzzle 1}, {Puzzle Title 4} belongs to {Puzzle 4} etc. (See the example screenshot in the next paragraph).
Remember: These are just temporary numbers on a page. For example, the third page with puzzles that's generated in step 5, will have replace {Puzzle Title 1} with "Puzzle 13", and {Puzzle 1} with the image file for puzzle 13.
Note: If this dazzles your mind, just remember not to edit these placeholders.
Create Grid and Edit Layout
You can set up the grid just like you did for "Auto", but in this case you need to click "Create Grid" to actually create a template slide. With a 2x3 grid, it can look like this:
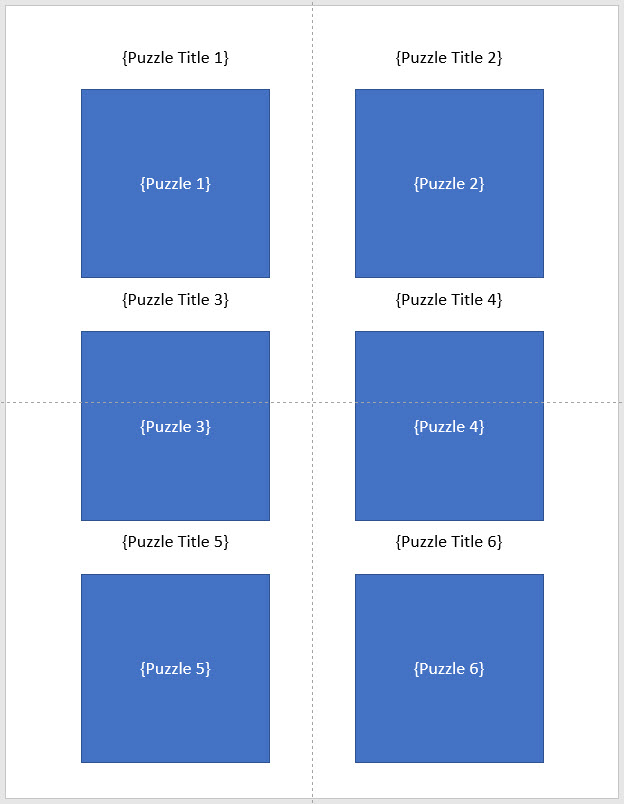
Here you can see the 6 different placeholders for puzzles, and 6 for puzzle titles. (You'd see the same type of placeholders on the solution template.
As long as these placeholders remain in place, you can completely change the look and feel of this template slide. For example, change the position of titles and puzzles, change the font and color of the titles. You can also change the size of the puzzle placeholders.
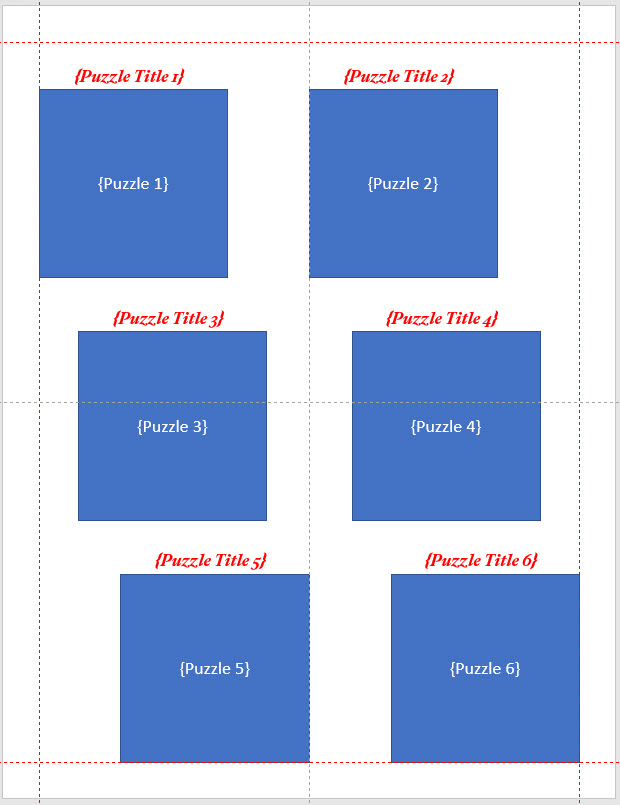
You could even copy the template slide and remove some of the puzzles, to have 2 puzzles on the first page, and 4 on the second page.
You can repeat this step for the Solution Grid, so you'll end up with at least one Puzzle Page Template, and one Solution Page Template.
Select Slides
You can create 1 or more template slides for the puzzles, and 1 or more tempate slides for the solutions. That means the plugin cannot really know which is which, and you have to specify which slides to use. (That means you can even create one master Powerpoint file with all your templates, and just select the ones you need for this session).
When you use more than 1 template slide for puzzles or solutions, you can also include slides that do not have any placeholders, but other text, images, etc.
In the screenshot below we've used 1 puzzles template slide and 1 solutions template slide:
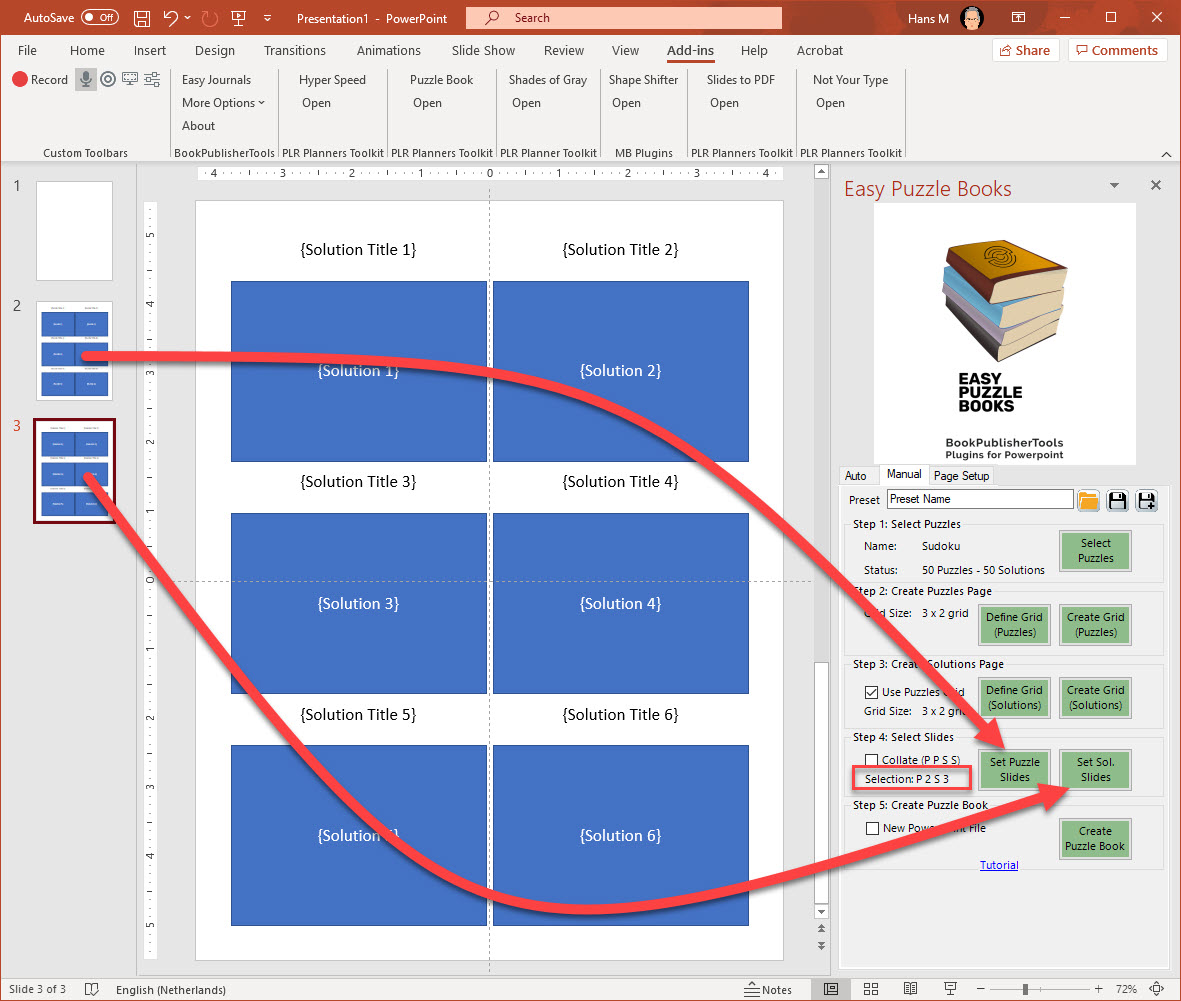
First select the puzzle slide (or slides) in 'Slides Pane'. In the example that's slide 2. With this slide selected, click the green "Set Puzzle Slides" button (Step 4).
Next select the solution slide or slides. In this example that's slide 3. Click "Set Sol Slides".
You can now see a small status text (the red rectangle in the screenshot): "Selection P 2 S 3". P is for Puzzles, S for Solutions, the numbers are the slide numbers.
Create Puzzle Book
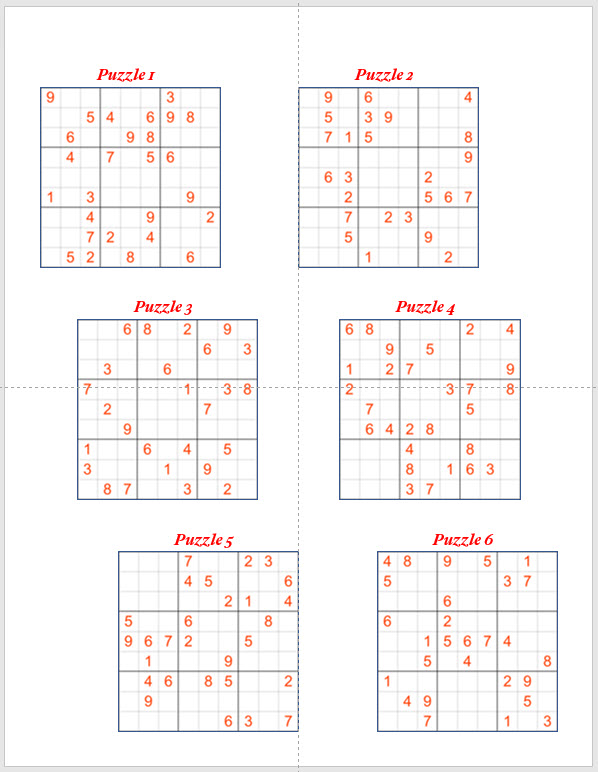
Just like in "Auto" mode, you can select whether you want to collate the puzzles and solutions, and whether you want the puzzle book to be created as a new Powerpoint file. Click "Create Puzzle Book" to use the slide templates and create your book. Here's an page created with the template from the earlier example:
Final remarks
Feel free to play with the options, and it's best to make a lot of mistakes and learn from them. (That's what I do as well).
The selected puzzle files and titles, and the grids, are shared between the "Auto" and "Manual" workflows. That means that you can start with an "Auto" approach, see how the puzzle book turns out, and if needed, use the "Manual" to finish the product.
Puzzles / Solutions per Page
The settings for Puzzles per Page and Solutions Per Page is part of the puzzle settings, but it can be adjusted when creating the grids: If you set it to 1, and the grid is 2x3, you'll need 6 puzzles / solutions per page. It will be automatically set to 6. (It's only adjusted when CREATING the grids, not in other steps)
However, there's no automatic check later on, so if you manually adjust these numbers, e.g. set the Puzzles per Page to 4, you may get an incomplete set of puzzles in your book, or worse, you get duplicates.
An example: For the first page, the first puzzle number will be 1. Then 2, etc. For the second page (more precisely: the second copy of the puzzles template slides, the first puzzle number will be 1 + the number of Puzzles per Page. When the Puzzles per Page are set to 4, the second page will start with puzzle 5. When Puzzles per Page is set to 8, the second page will start with puzzle 9.
If you use a grid with 6 puzzles on a page, the first example (with 4 puzzles per page) will result in duplicates, while the second example (with 8 puzzles per page) will never print puzzles 7 and 8.