How to use the Manual mode in Mixed Puzzle Books (plugin for Powerpoint)
This tutorial explains the Manual mode in Mixed Puzzle Books (plugin for Powerpoint)
Overview of the Manual process
Using Mixed Puzzle Books with Manual Layout adds a few steps to the Automatic process:
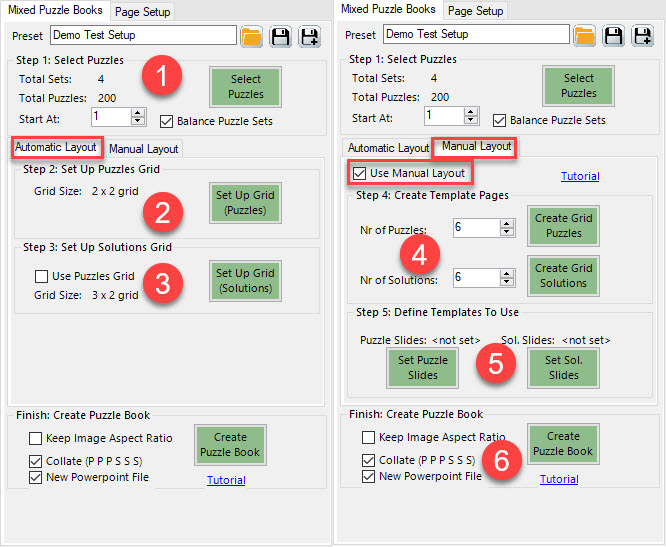
Some of the steps are identical to the "Auto" approach, some are different:
- Select Puzzles - Select puzzles and solutions
- Set up the Puzzles Grid (this will be used to generate the template in step 4)
- Set up the Solutions Grid (this will be used to generate the template in step 4)
- Create the Template Pages for your book
- Define the Templates to use - you have to tell the plugin which slides are the puzzles templates and which slides are the solutions templates
- Create Puzzle Book
In addition to that, you have to click the "Use Manual Layout" box to make sure the settings are used.

Step 1: Select Puzzles
This is step is identical for Automatic Layout and Manual Layout. A tutorial can be found here.
Step 2: Set up Puzzles Grid
This is step is identical for Automatic Layout and Manual Layout.
Step 3: Set up Solutions Grid
This is step is identical for Automatic Layout and Manual Layout.
Step 4: Create and Edit the Template Pages
For both the Puzzles template and the Solutions template, there are three things you need to do:
Step 4.1: Specify the number of puzzles for the template
The number of puzzles does not have to be equal to the grid size, because you can select more than one page (slide) for the template. For example, you could choose to create different 'left' and 'right pages.
For example, if you have a 2x2 grid (4 puzzles on a page), you could choose to have 4, or 6 or 8 puzzles in the template. (or any other number!). If you choose a number larger than 4, you'll need multiple pages. By default the nur of puzzles is set to the grid size.
Step 4.2: Create Grid Puzzles (or Solutions)
Click the green button "Create Grid Puzzles" (or "Create Grid Solutions") to create new slides with the specified number of puzzles.
The screenshot shows a grid with 3 rows and 2 columns, and Nr of Puzzles set to 6, so you'd get just 1 single slide.
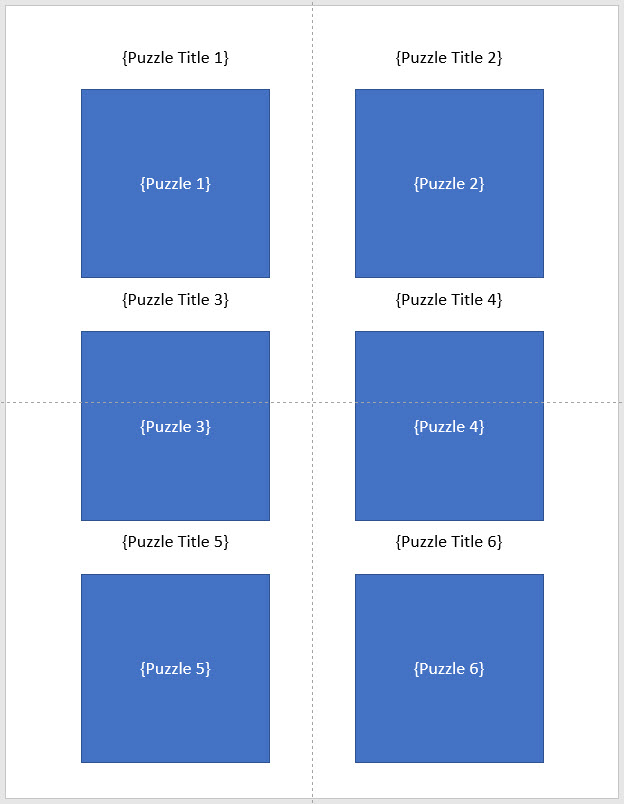
Here you can see the 6 different placeholders for puzzles, and 6 for puzzle titles. (You'd see the same type of placeholders on the solution template.
As long as these placeholders remain in place, you can completely change the look and feel of this template slide. For example, change the position of titles and puzzles, change the font and color of the titles. You can also change the size of the puzzle placeholders.
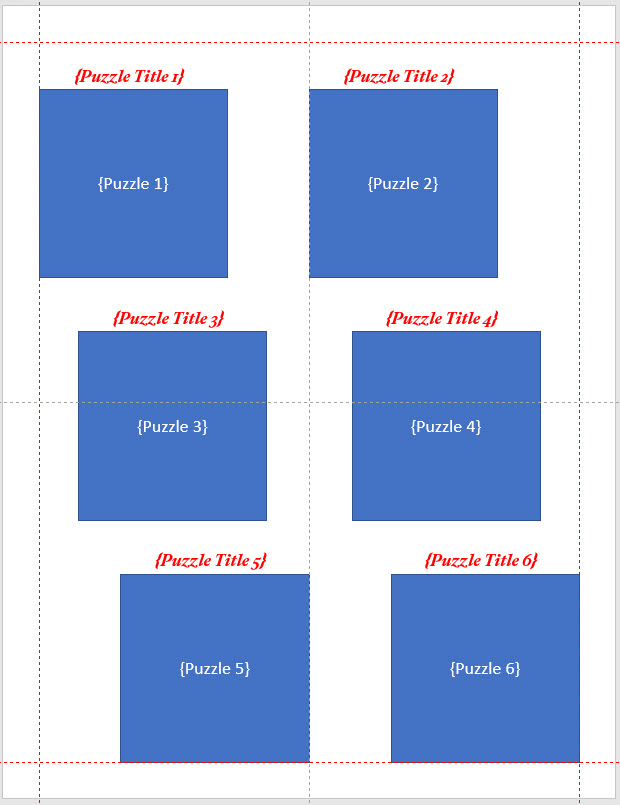
You can repeat this step for the Solution Grid, so you'll end up with at least one Puzzle Page Template, and one Solution Page Template.
Summarized: The Grid Size (e.g. 2x2) defines how a basic grid will be generated, the "Nr of Puzzles" controls how many puzzles will be used on the template. (You can leave it to be identical to the default values)
Step 5: Define the Template Pages To Use
You can create 1 or more template slides for the puzzles, and 1 or more tempate slides for the solutions. That means the plugin cannot really know which is which, and you have to specify which slides to use. (That means you can even create one master Powerpoint file with all your templates, and just select the ones you need for this session).
When you use more than 1 template slide for puzzles or solutions, you can also include slides that do not have any placeholders, but other text, images, etc.
In the screenshot below we've used 1 puzzles template slide and 1 solutions template slide:
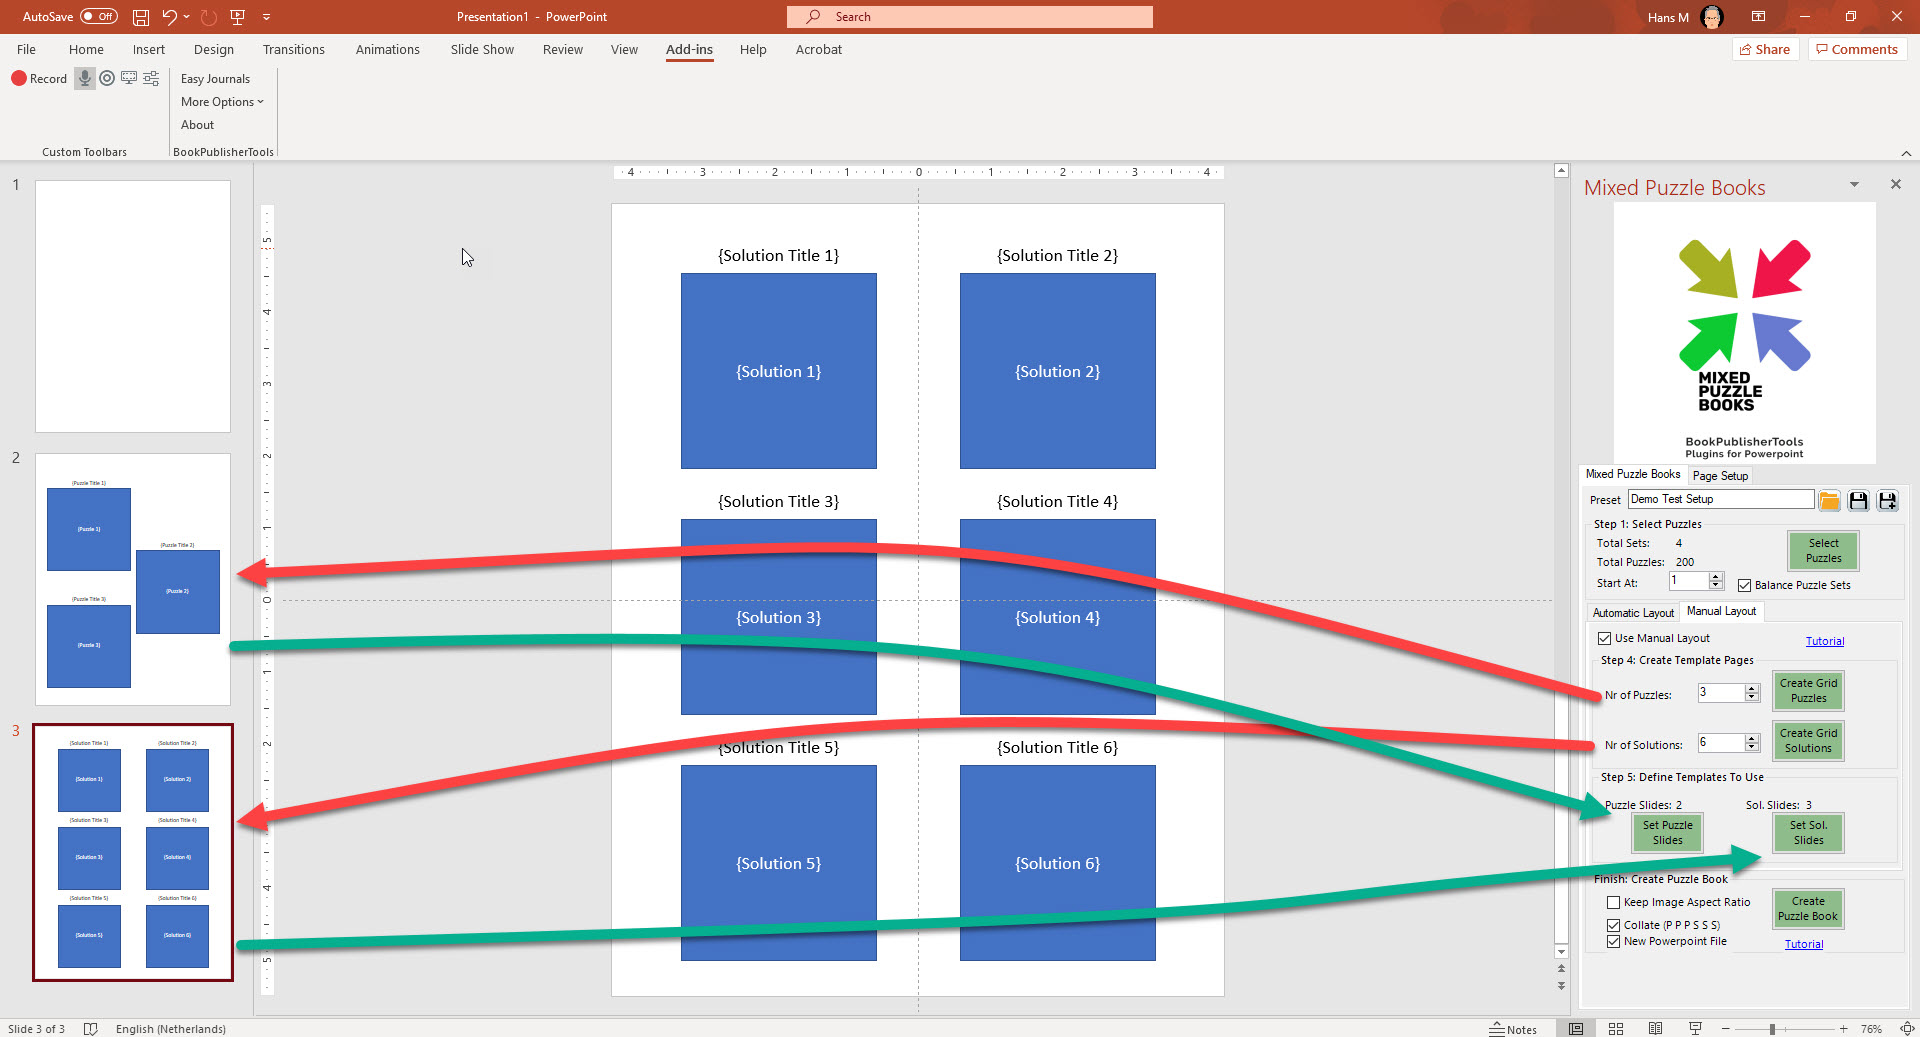
The red arrows (right to left) show how the "Nr of Puzzles" determines the layout. The green arrows show the definition of Puzzle Template and Solution Template.
To do this: First select the puzzle slide (or slides) in 'Slides Pane'. In the example that's slide 2. With this slide selected, click the green "Set Puzzle Slides" button (Step 4).
Next select the solution slide or slides. In this example that's slide 3. Click "Set Sol Slides".
You can now see a small status text (the red rectangle in the screenshot): "Puzzle Slides: 2" and "Sol Slides: 3". The numbers are the slide numbers.
Finish: Create Puzzle Book
The settings for the final step are identical to the settings for Automatic Layout. Click "Create Puzzle Book" to create slides (optionally in a new file) with your puzzles and your manual layout.
The screenshot below shows the results when you'd use 3 puzzles in the template, in an edited 2x2 grid, and 6 solutions in a 2x3 grid.
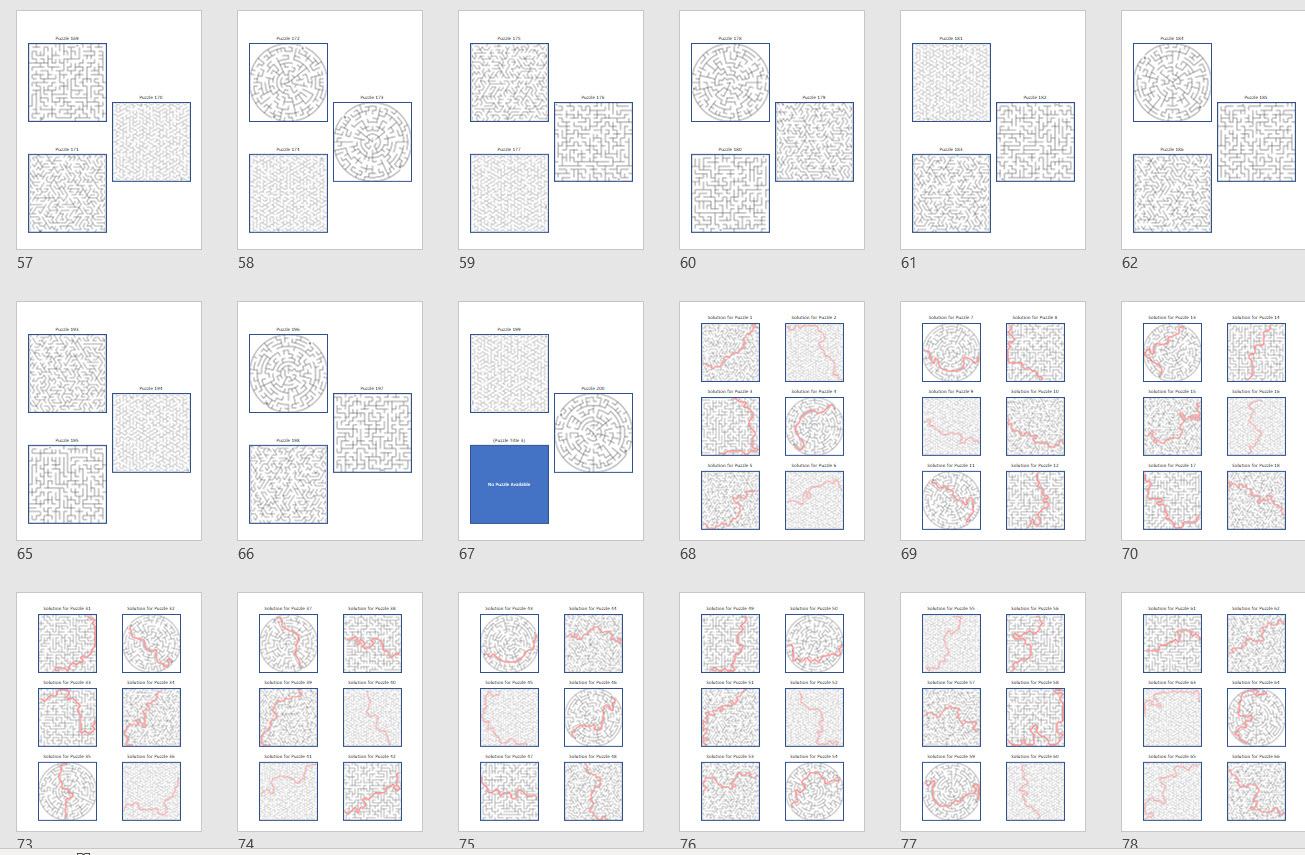
You can see one blue square: That's one of the placeholders in the template that was not replaced by a puzzle (because there were only 200 puzzles, this would be puzzle 201). You'll need to remove these additional placeholders manually.
Final remarks
Feel free to play with the options, and it's best to make a lot of mistakes and learn from them. (That's what I do as well).
The suggested workflow, at least while getting started, is to set up the puzzles and the grid, and create a book from those puzzles. That way you can see how the puzzles work together when mixed. The next step can be to choose a different grid format, or to choose the Manual Layout.
Once you've create a couple of books, you'll probably have a couple of layout templates that work well for you, that can be reused (using presets).
Puzzles / Solutions per Page
The settings for Puzzles per Page and Solutions Per Page is part of the puzzle settings, but it can be adjusted when creating the grids: If you set it to 1, and the grid is 2x3, you'll need 6 puzzles / solutions per page. It will be automatically set to 6. (It's only adjusted when CREATING the grids, not in other steps)
However, there's no automatic check later on, so if you manually adjust these numbers, e.g. set the Puzzles per Page to 4, you may get an incomplete set of puzzles in your book, or worse, you get duplicates.
An example: For the first page, the first puzzle number will be 1. Then 2, etc. For the second page (more precisely: the second copy of the puzzles template slides, the first puzzle number will be 1 + the number of Puzzles per Page. When the Puzzles per Page are set to 4, the second page will start with puzzle 5. When Puzzles per Page is set to 8, the second page will start with puzzle 9.
If you use a grid with 6 puzzles on a page, the first example (with 4 puzzles per page) will result in duplicates, while the second example (with 8 puzzles per page) will never print puzzles 7 and 8.