How do I use the Style options for Puzzle Maker Pro - Geometric Mazes?
This tutorial shows how to use the How do I use the Style options for Puzzle Maker Pro - Geometric Mazes.
There are three major ways to change the style of the maze:
- Changing the passages (or 'doors') between the different maze cells
- Changing the walls between the maze cells
- Changing the solution path
These Style settings will work closely together with the Colors settings.
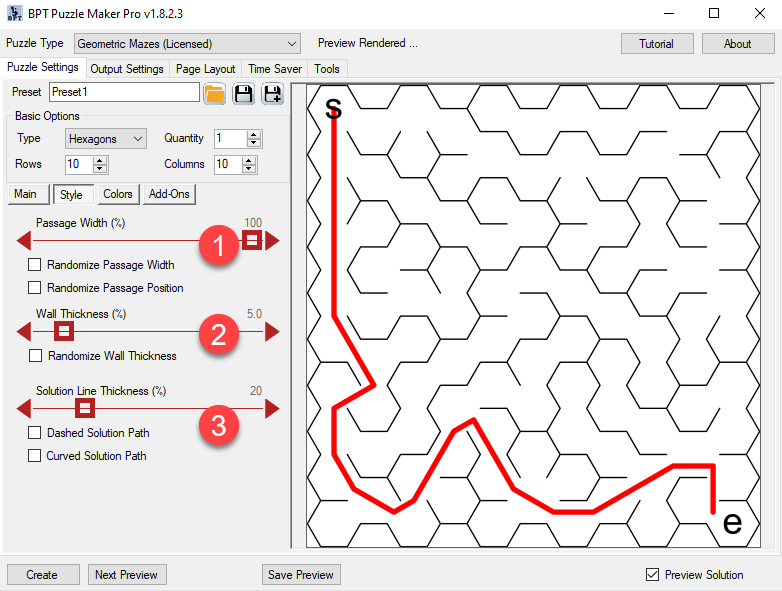
Passage Settings
By default the passages are fully open. However, you can change that. Use the slider to set the passage to a percentage of the cell size. (A percentage instead of a fixed number of pixels will preserve settings when you use a different image size or resolution).
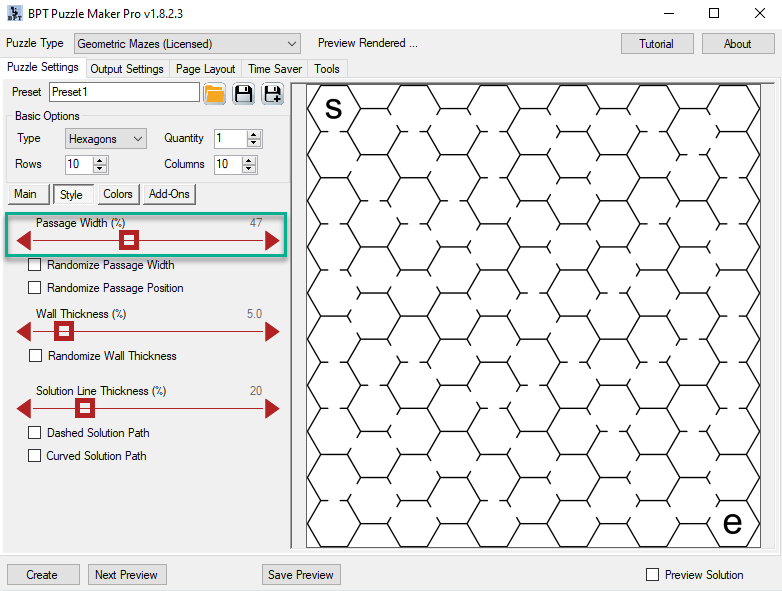
By setting the Passage Width to approx 50% you get a different type of maze, it will seem to be more complex, even though it has the same number of cells as the first screenshot on this page.
Using very small values for Passage Width may interfere with the Wall Thickness and Colors settings - in some cases the passage will be drawn as closed because the walls are too thick. Always check the results of your settings visually before creating a large number of mazes.
Randomize Passage Position
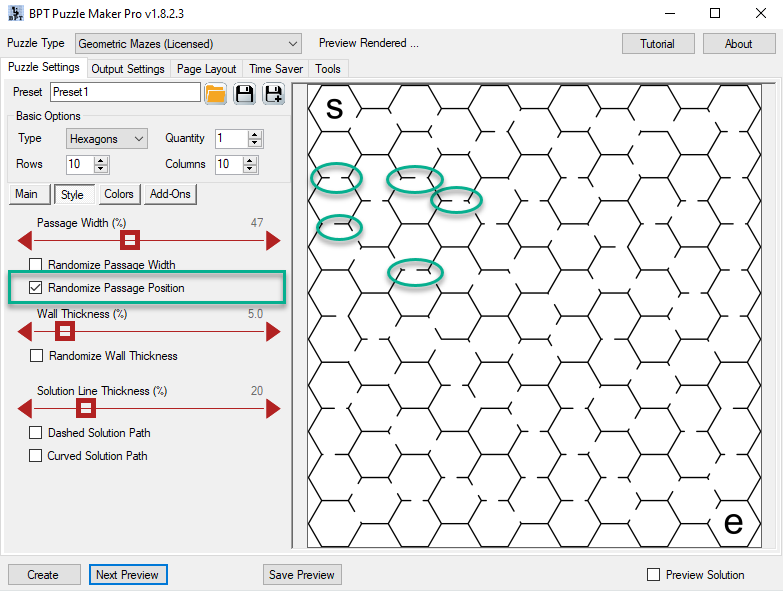
As you can see in the screenshot, randomizing the passage position will move it slightly to the left or right, creating a more complex maze. This option will have no effect when the passages are fully open.
Randomize Passage Width and Position
Randomizing the Passage Width will randomly add or subtract up to 50% of the Passage Width, creating a more chaotic maze.
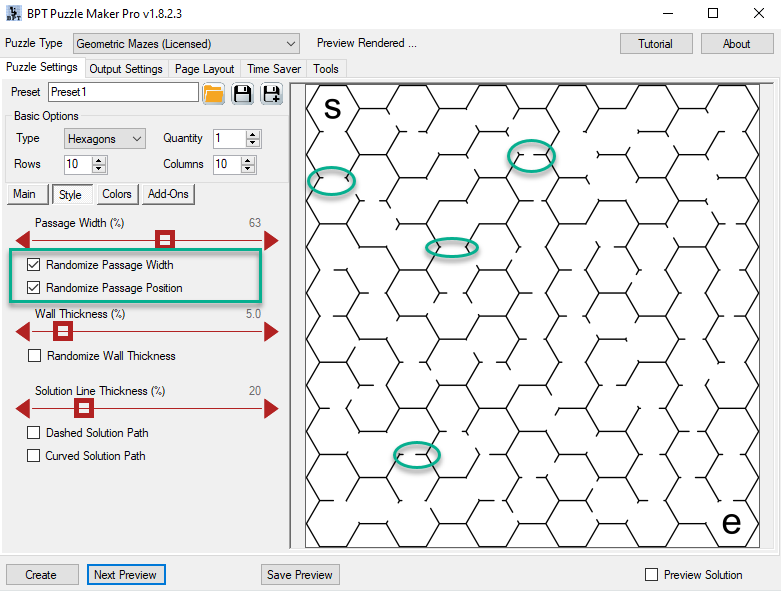
In the screenshot we've randomized both the Width and the Position, you can also randomize either of them separately.
Wall Settings
The Wall Thickness has a huge impact on the look and feel of a maze, even without changing the colors.
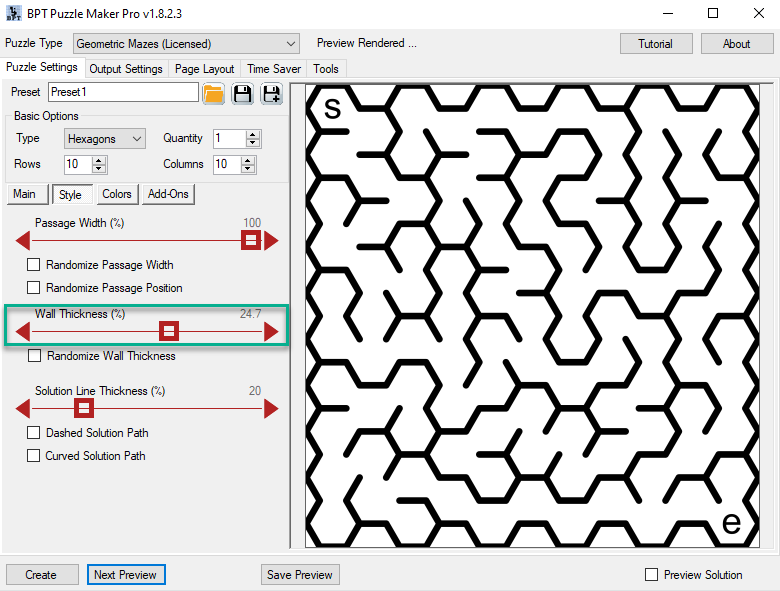
Just like the Passage Width, the Wall Thickness is also set as a percentage of the cell size.
Randomize Wall Thickness
You can randomize the Wall Thickness, this add or subtract up to 50% of the Wall Thickness. This will make it look quite chaotic.
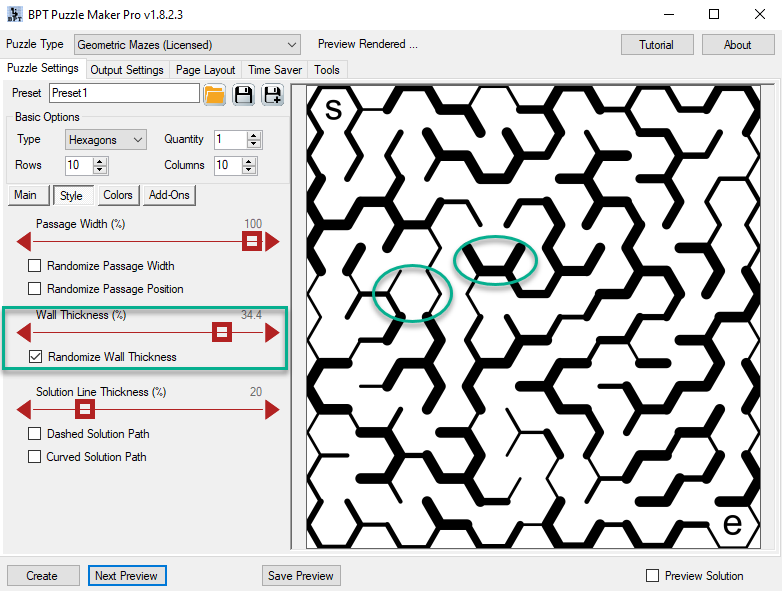
The randomization will be done on a cell by cell basis. This means that all walls of a cell will have the same weight (thickness), unless a neighboring cell has even thicker walls. You can see in the screenshot that this results in an organic look and feel of the maze.
If you use a low value for the Wall Thickness, combined with randomization, the result may look a bit like a hand-drawn maze.
Solution Line Settings
The Solution Line is the line through the maze that connects the Start and End points.
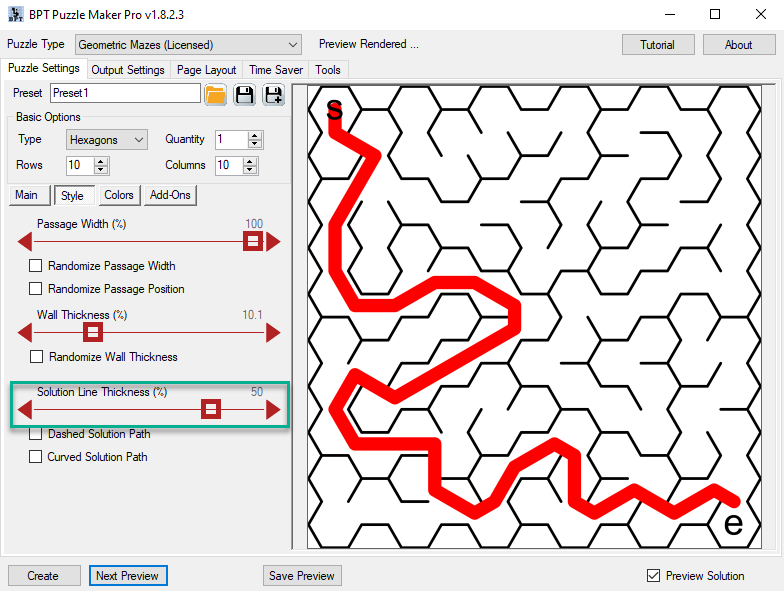
First of all, you can change the width (weight, thickness), again as a percentage of the average cell size.
Curved Solution Path
If you don't like the more angular style of the default solution line, you can change it to Curved:
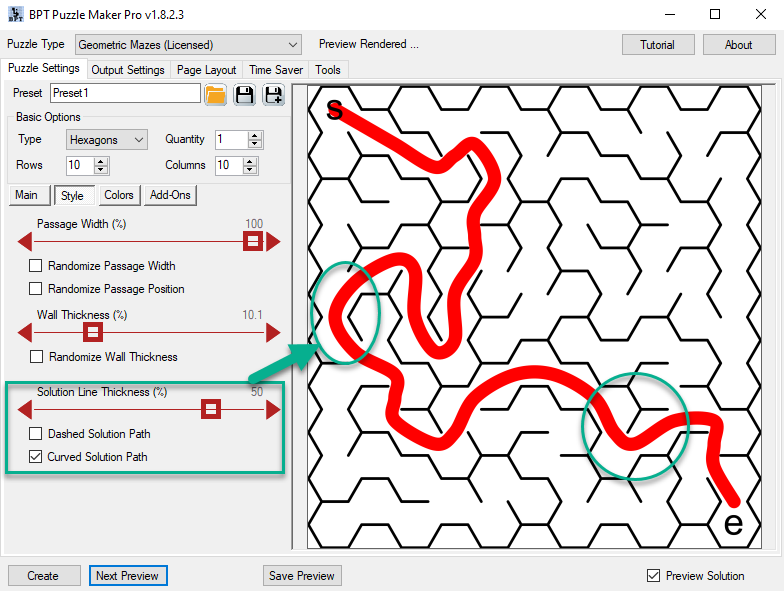
Curved solution paths look more smooth and natural, the way someone would manually draw the path in a maze.
Dashed Solution Path
Finally you can change the continuous line into a dashed (dotted) path:
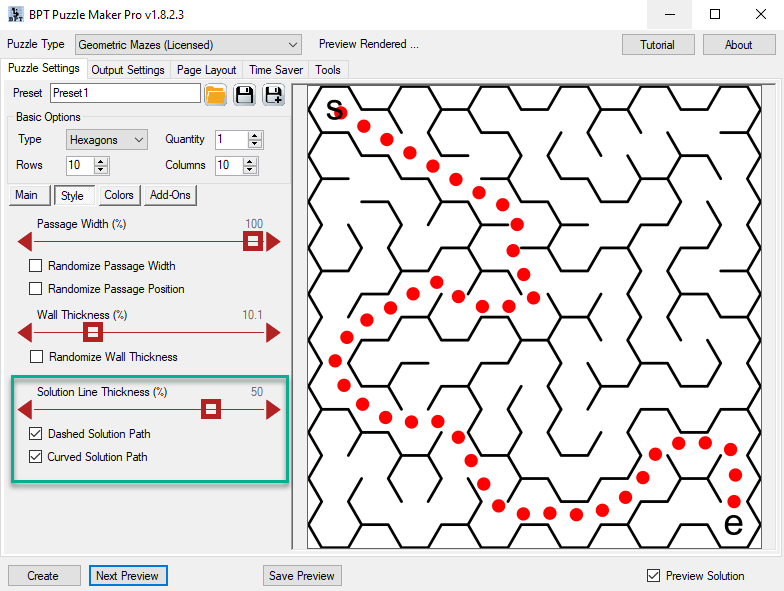
This will make it look more like footsteps or breadcrumbs in your maze.
Warning
Especially at more extreme settings (small passage width, large wall thickness, large solution line thickness, and randomization) you'll have to really visually check if the mazes look good, using the colors you selected. There are many customization options allowing you to create beautiful mazes, but they will also allow you to create mazes that are less esthetically pleasing.