How to Set Up Your Grid for Easy Puzzle Books (plugin for Powerpoint)
This tutorial shows how to set up grids for Easy Puzzle Books.
Overview
With the Grid Editor you can set the number of columns and rows, in the red square in the screenshot below.
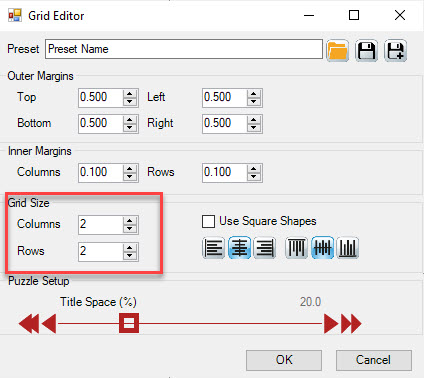
Columns sets the number of puzzles next to each other (horizontally). Rows sets the number of puzzles below each other (vertically).
The grid will be determined by the trim size of your book and the type of puzzle: A 8.5"x11" sudoku book, can easily have 2 columns and 3 rows, unless you want to use a large font size. A coloring book usually has only one image on each page (1 column, 1 row).
Outer Margins
You can set top, bottom, left and right margins that will be excluded from the puzzles area. These margins can be, but don't have to be, identical to the page margins you've set elsewhere.
However, if you want to add additional text, embellishments or other content on your page, you can use the Outer Margins to specify where the puzzles should start. For example: If you place a 2" image or text at the top of each page, you can set the top margin to 2" or 2.5".
Inner Margins
Inner Margins, or padding, is the empty space between columns and rows. In most cases you'll want at least 0.1", or better 0.25", to add enough space.
Square Shapes and Alignment
By default, the grid will divide the available space on the page into a grid, based on the columns and rows settings. This will usually create rectangular placeholder shapes. In many cases, such as sudoku, most word search puzzles, etc, puzzles are square, not rectangular. You can use the option "Use Square Shapes" to create square shapes instead of rectangular.
The six buttons below the "Use Square Shapes" option set the alignment for the text and images: Left - Center - Right and Top - Middle - Bottom. This will determine where square shapes will be placed but also where puzzles will be placed inside the shapes, if the format is not identical to the shape.
Note: For "Auto", these settings will be applied in the background, since there will be no visible placeholder shapes. For "Manual", these settings will be applied to the placeholder shapes only. Once you create a book in "Manual" mode, it will only use the placeholder shapes, not the grid settings.
Title Space
For each puzzle there's a "Title" and an "Image" (the image is the actual puzzle or solution).
When you create a grid, for example with 2 columns and 3 rows, there will be 6 areas. Each of these areas will contain a title and a puzzle. By default, the top 20% of the area is reserved for the puzzle. In some cases this will be too much, and you can adjust this to get the perfect layout for your books.
Note: Once you have found a good layout for a certain type of puzzle and a certain trim size, you can save these settings as a Preset, allowing you to reuse the settings each time you create those books.
Examples
In the examples we used a page size of 8.5"x11"
"Auto" 2x3 Grid
In "Auto" mode, the grid you specify will not be created visibly, until you create a book.
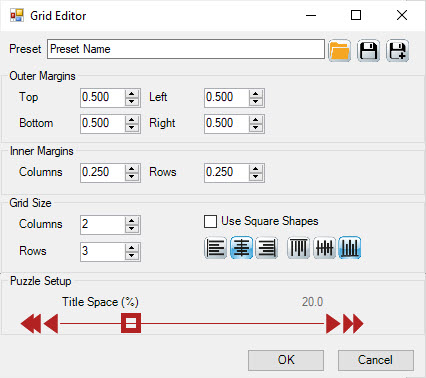
In this screenshot you can see we've set the interior margins to 0.25", for a grid of 2 columns and 3 rows. The result is shown below:
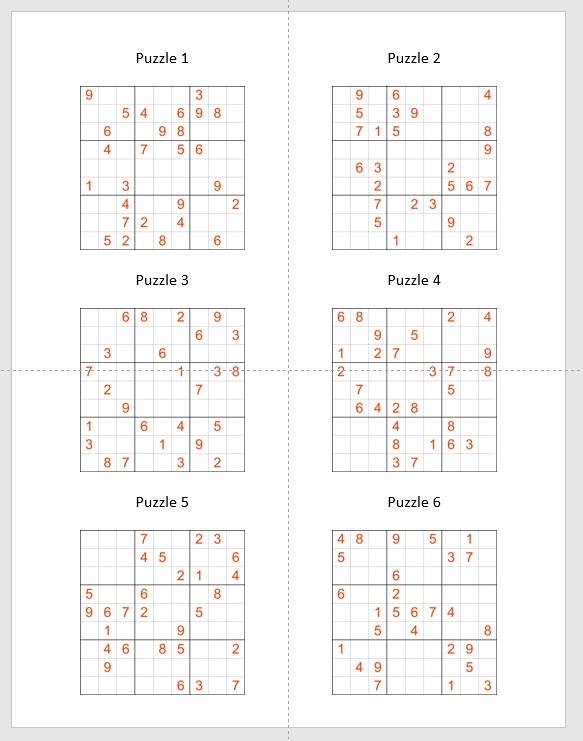
This page was created using a set of sudoku puzzles. As you can see, the space between the columns is far more than 0.25", because the puzzles are square, and centered in the available space for each grid location.
In this case, the titles may be placed a bit too far from the puzzles (which is a matter of taste and design best practices).
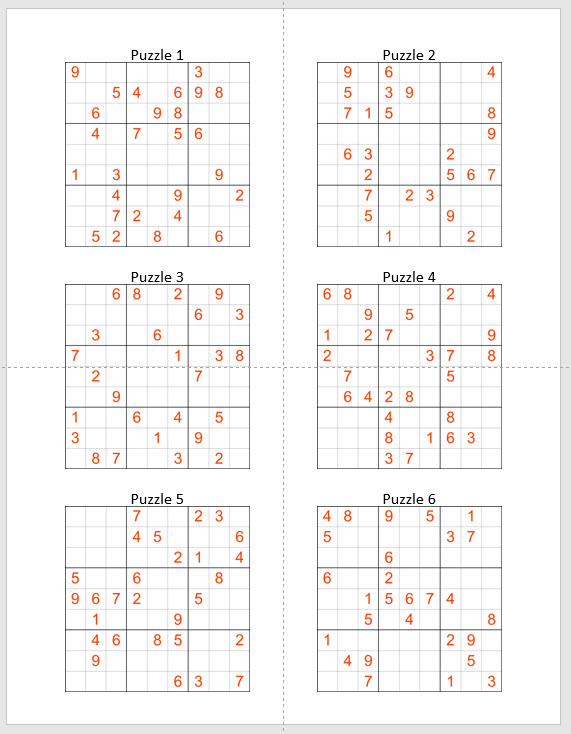
Let's reduce the title space to 10%:
"Manual" 3x4 Grid
In this second example, we'll use a 3x4 grid, and set the title space to 15%.
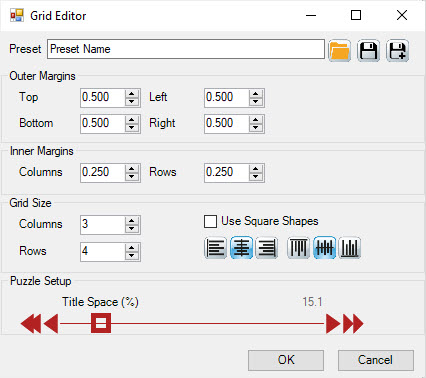
"Use Square Shapes" is not selected for the first results, and look at the screenshot below:
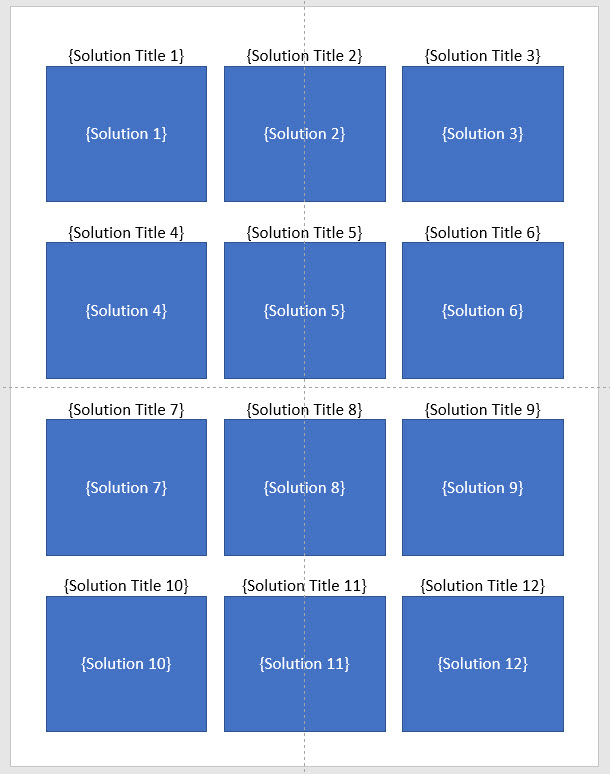
The shapes are rectangular, and there's 0.25" space between the shapes.
The next example has "Use Square Shapes" switched on, and you'll quickly see the difference.
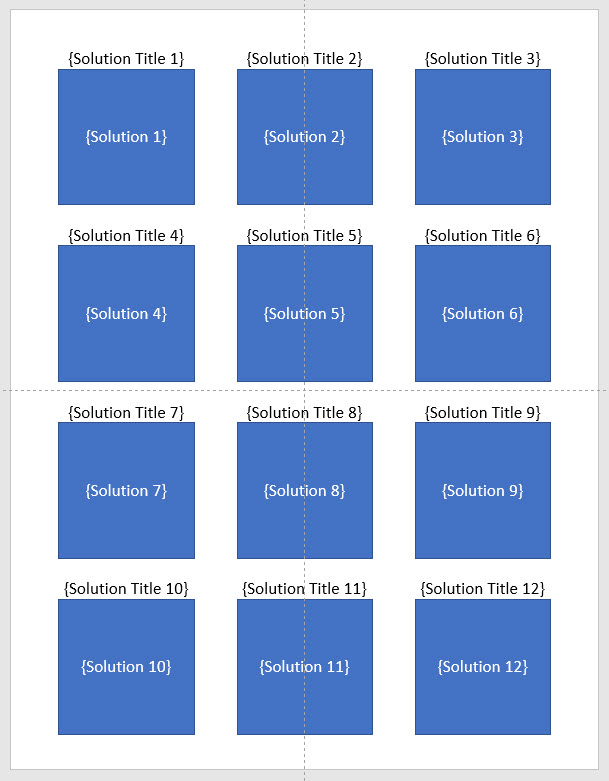
Note: In the "Manual" mode, each of these blue shapes will be replaced by a puzzle image. If the puzzle does not have the same format (square or rectangular with the same ratio), it will reduce the size of the puzzle image to make it fit inside the blue placeholder.
Note 2: The placeholders in these images are blue because that's the default setting for Powerpoint on this computer. You may have other settings. The color is not important, because the shape will be replaced by a puzzle later on.