How to add Shapes to your design in Geometric String Art Designer
Adding Shapes
Adding and configuring shapes in Geometric String Art Designer is done in 4 steps:
- Add the shape to the canvas
- Set the size and position of the shape
- Adjust the size and position of the shape with pixel-precision
- Set up the Segments for the shape
Step 1 - Add the Shape
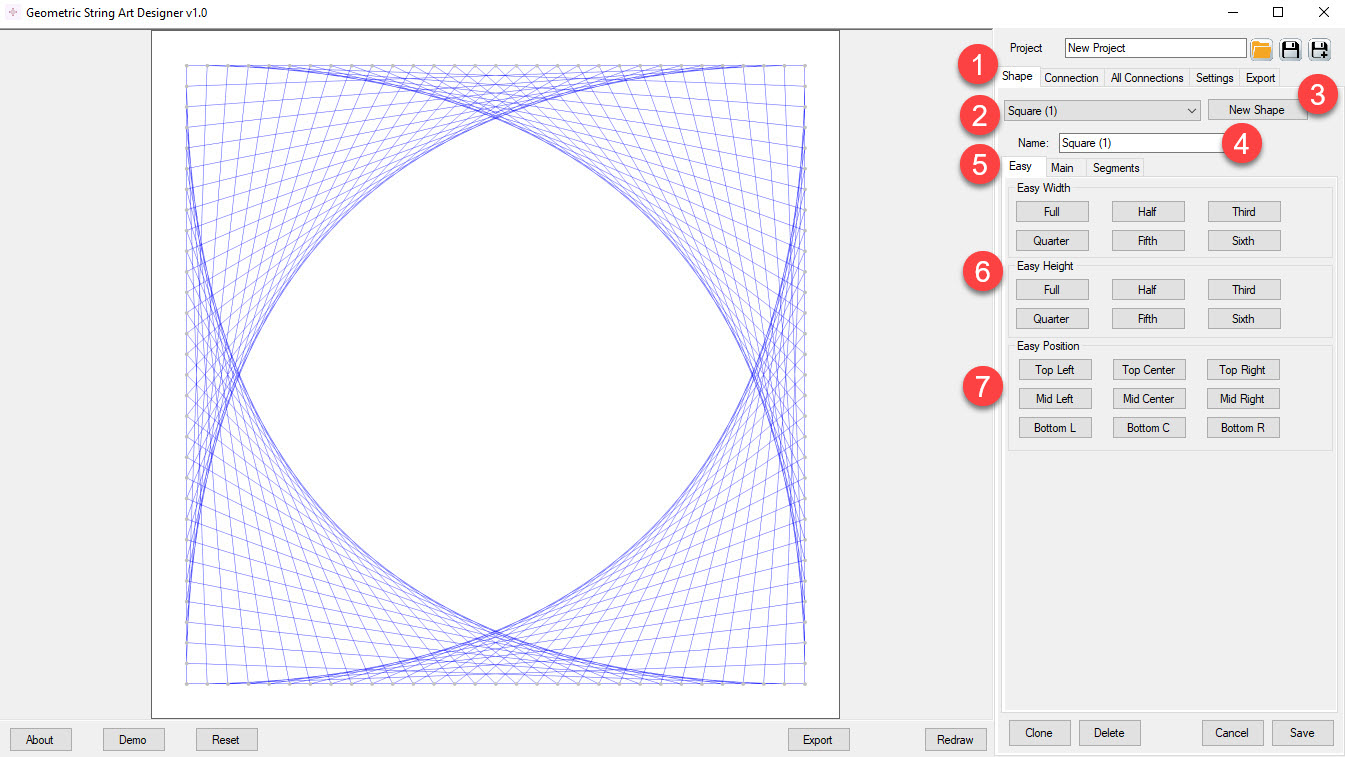
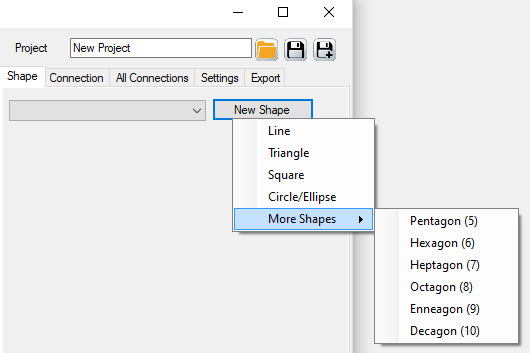
To add shapes to your design, go to the "Shape" tab (1) and click "New Shape" (3). This will display a pop-up menu where you can select the shape you want: Line, Circle, Triangle, Square or Polygon (5 to 10 edges). Click to select the shape you want.
Note: to edit any of the shapes you've added, use the shape selection dropdown menu (2).
The shape will have standard size and position, but this is easy to change in step 2.
Step 2 - Set Size and Position
On the "Easy" tab (5) you can set the size of the position with just a few button clicks. You can separately set the height and width (6). The buttons indicate sizes based on the current canvas size and margins: "Full Width" means the maximum size within the margins.
You can also quickly set the position using the "Easy Position" buttons (7). In many cases, this is all you need to do to get the shape sized and positioned correctly. If you need more control, go to step 3.
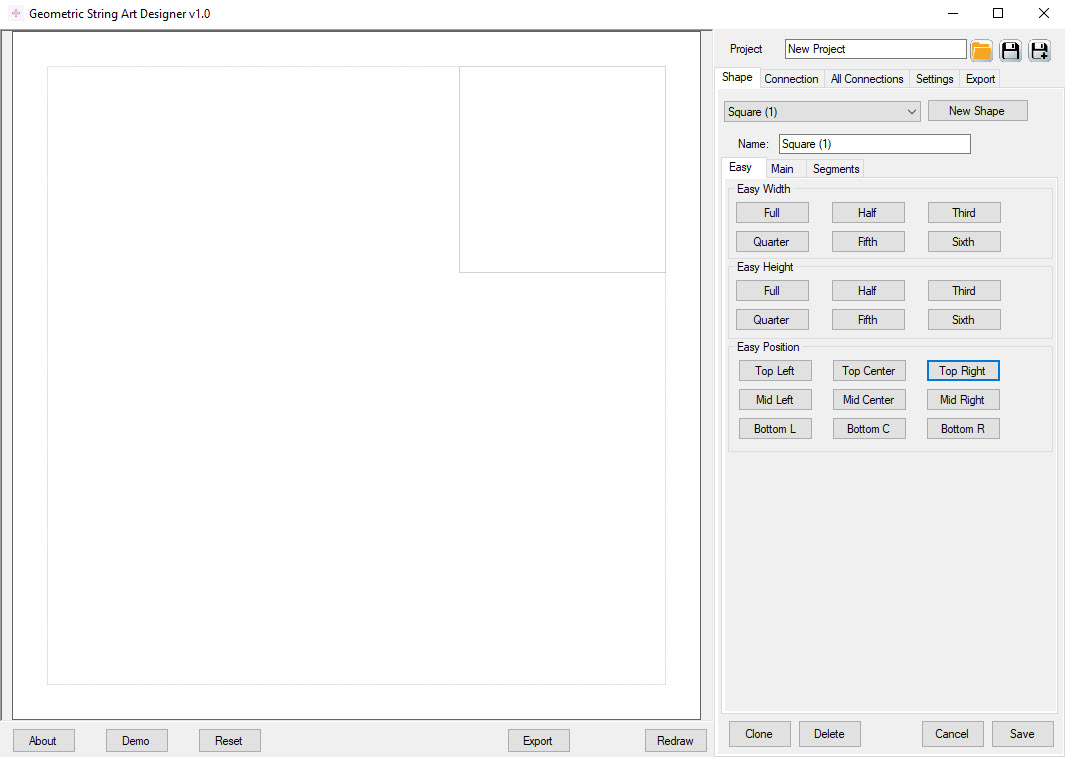
The screenshot shows an example where the width and height have been set to one third of the maximal width and height, and the shape has been positioned in the top right of the canvas (within the margins).
Step 3 - Adjust Size and Position
On the "Main" tab you can find settings to further adjust the size and position.
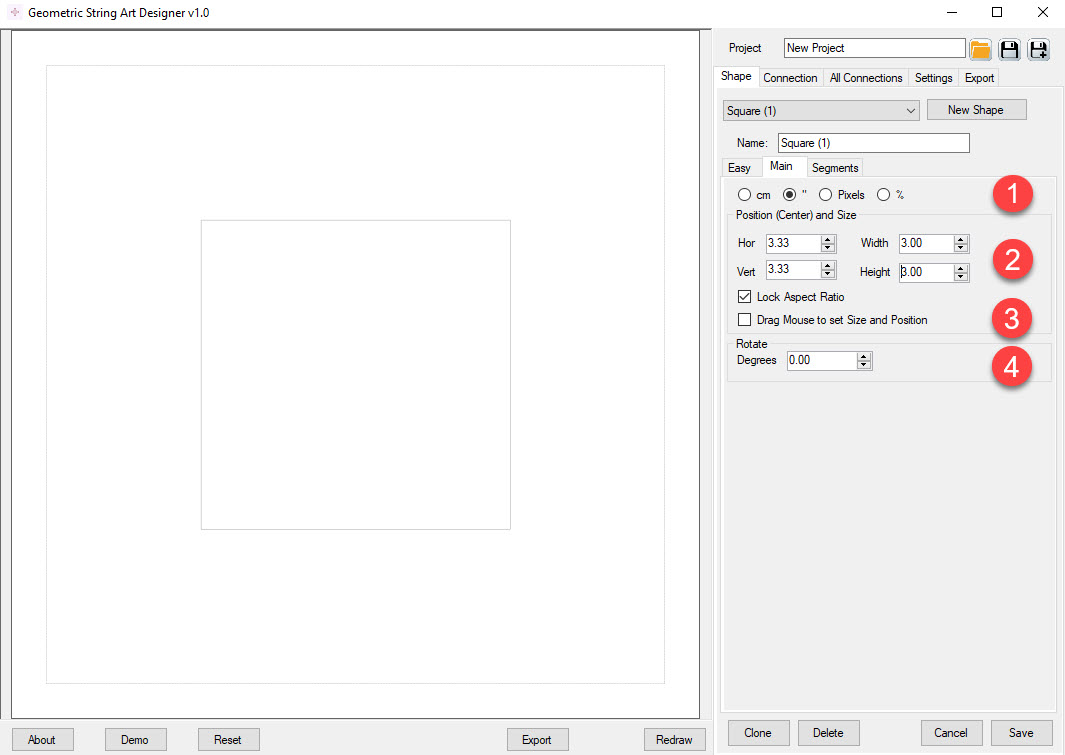
- You can choose between centimeters, inches, pixels or a percentage, to set the position and size of the shape. This will apply to all the size and position settings in the software.
- You can set the horizontal/vertical position in detail, as well as the width/height of the shape. Optionally you can lock the Aspect Ratio, which means that the relative height/width proportion of the shape will not change. (Note: For Triangles and Polygons, the height and width will be the same)
- An additional option, is to drag the mouse over the canvas to set the size and position of the shape. Just click this checkbox, then click and drag the mouse over the canvas, and let go of the mouse-button. This will work just once (unless you click the checkbox again), the normal behaviour of the mouse-buttons and mouse-wheel is to zoom and drag the entire image.
- You can also rotate the shapes. This will give an additional complexity to the strings that are drawn between separate shapes.
Note: You can also change these settings after you've set up one or more connections. This will let you see immediately what the effect of the changes is.
Step 4 - Set up the Segments
There are three options to add segments to the shapes. Segments are used to connect the different shapes. Read more in the Glossary of Shapes and Segments.
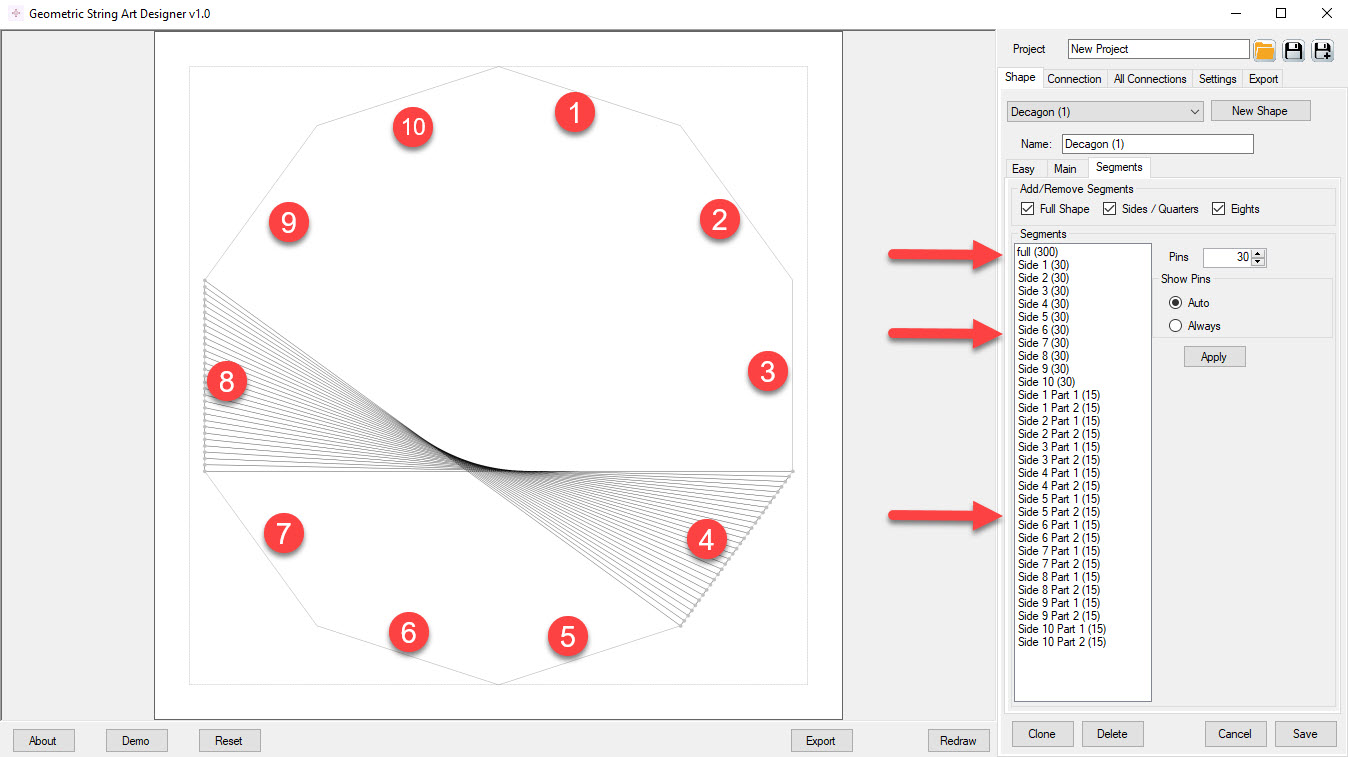
Use the "Segments" tab to choose which segments you want to use. Full, Quarters or Eights. It's best to only select the set you need - selecting the right one later on is easier when you have less clutter. In the screenshot you can see all the options and segments for a decagon. Note: You can also edit this later.
Pins
The string between two segments are connected to the pins of each segment. Pin 1 to pin 1, pin 2 to pin 2, etc. Therefore it's important to set the number of pins for each segment properly.
If the number of pins of both segments is not identical, the software will connect multiple pins from one segment to a single pin on the other segment.
You can also set the number of pins for a segment to 1 or 2, for special effects.
Cloning Shapes
If you have a shape set up just right, and want to create identical copies, use the "Clone" button at the bottom. This will create an identical shape, with a different name, and the same size, position and segment settings.
Deleting Shapes
To delete a shape, first select it on the "Shape" tab, then click the "Delete" button at the bottom