Getting started with POD Graphics Maker
POD Graphics Maker is a quick and easy way to make (mostly geometric) images with only a few presses of a button.
There are multiple modules available:
- Starter Bundle
- Expansion Pack 01
- Expansion Pack 02
- Expansion Pack 03
- Expansion Pack 04
- Image Mosaic
- Roman Mosaics
The patterns are inspired on Zentangle Style drawings, Mosaics, and Quilting.
For the sake of this tutorial, we will only use the Tile patterns that are in the Starter Bundle. We have a separate tutorial for using Shapes, and using Full Patterns
Of course, the best way to explore this software is to just try out all the settings and see what they do, and what creates an end result that you like.
Getting Started
Upon starting the software, you'll see a screen similar to this:
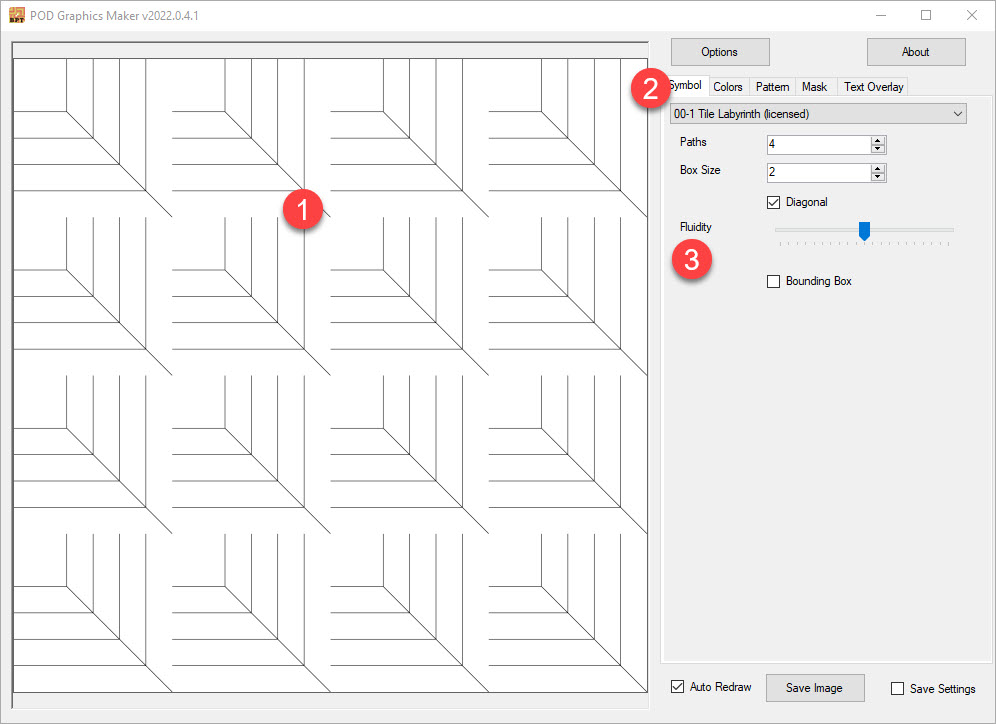
Let's go over the options one by one.
- The preview Screen
- The options to change the appearance. We'll go over these tabs and what they can do one by one.
- Fluidity. One of the more genius possibilities, this slider will turn the straight lines into rounded lines. Feel free to play around with this option to see how it impacts the result, it's different for every pattern.
Options
In the Options Screen (top right) you can also select some base settings. Let's get these set up first before we start playing with all the other options.
The options screen has two tabs: General, and Size and Tiling.
In General, you can change where the file is saved, what kind of file it saves (Transparent PNG is biggest, but if you want to use transparency options, this is the only format that supports it), and if you want to use a watermark.
In Size and Tiling, you can change the size of the file, and how you want it printed.

If you want a simple repeating pattern, then Paper Style is the choice to make. However, if you want to make a background for powerpoint, or paper, then Paper Style allows you to finetune the sizing more. However, in Paper Style, you may not get a repeating pattern, and the squares on the right and bottom may be cut off halfway through.
For now we've put the canvas size at the standard 5000 pixels, and 4 tiles horizontal and vertical, so we can see what each option does.
Symbol Settings
The Symbol tab is different for every pattern, with unique options depending on what the pattern looks like. The one consistent option is the Fluidity slider.
Using the Labyrinth pattern as an example, let's see what the settings do.
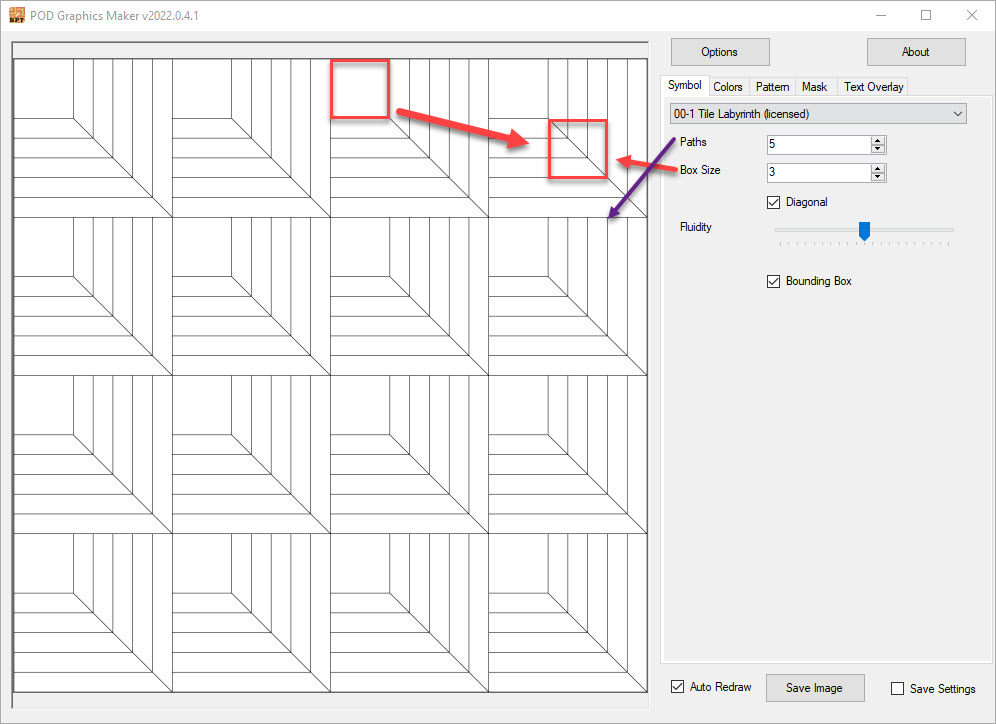
We've used some arrows to hopefully make the impact of the settings clearer.
The red arrows show the box size. The box is the little square in the top left corner of each tile. By setting that on 3, that means that it is as big as 3 of the lines next to it. Both red squares are the same size, so you can see what this means in actuality.
The Paths option, with the purple arrow, shows how many paths there are next to the square.
We've also turned on the bounding box, which puts a neat line around each square. Not every pattern looks good with a bounding box, and not every pattern looks great without one, so feel free to test what you like.
Colour settings
In this screen you can change all colour settings, from the lines, to using transparency, to using multiple colours. You can also change how thick the lines are.
If you select "use fill colours", you can also change additional colours.
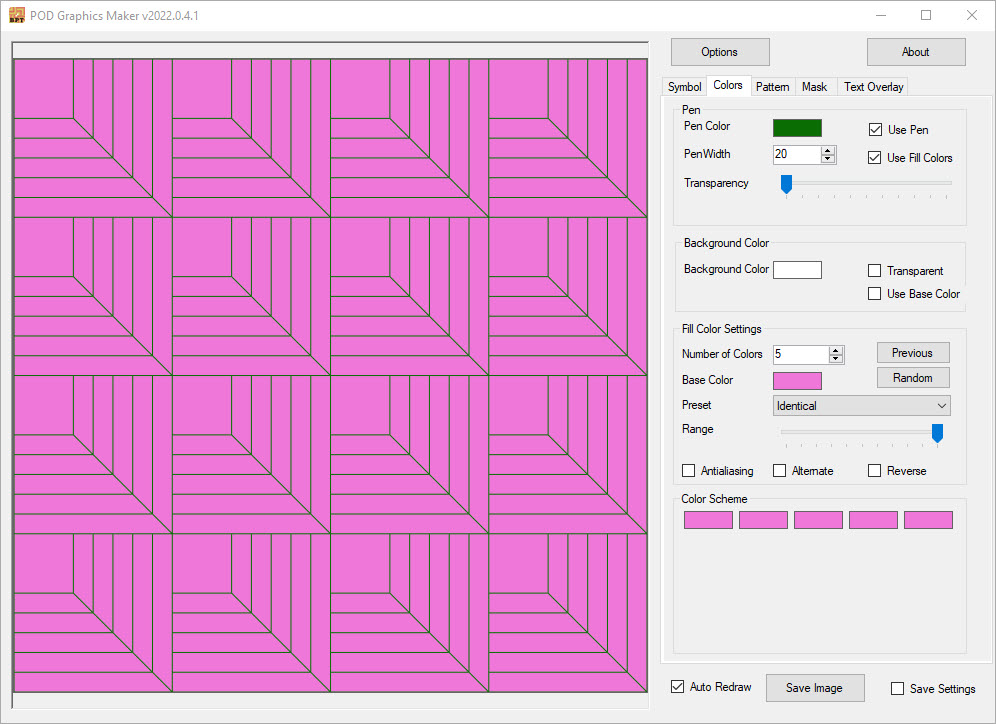
In the example below you can see we've changed the pen colour to a dark green, and changed the width to 20.
We've also set up a base colour of pink. You can also see that there is the possibility to set up a colour scheme. There are multiple ways of handling this. If you know your colour theory, you can set up custom colours.
If you're not the artistic type, don't worry! The software has multiple presets for the colours that tend to give a good result.

Pattern Settings
Here you can rotate the squares. You can also rotate the entire canvas. The image below explains how the small and large squares work.
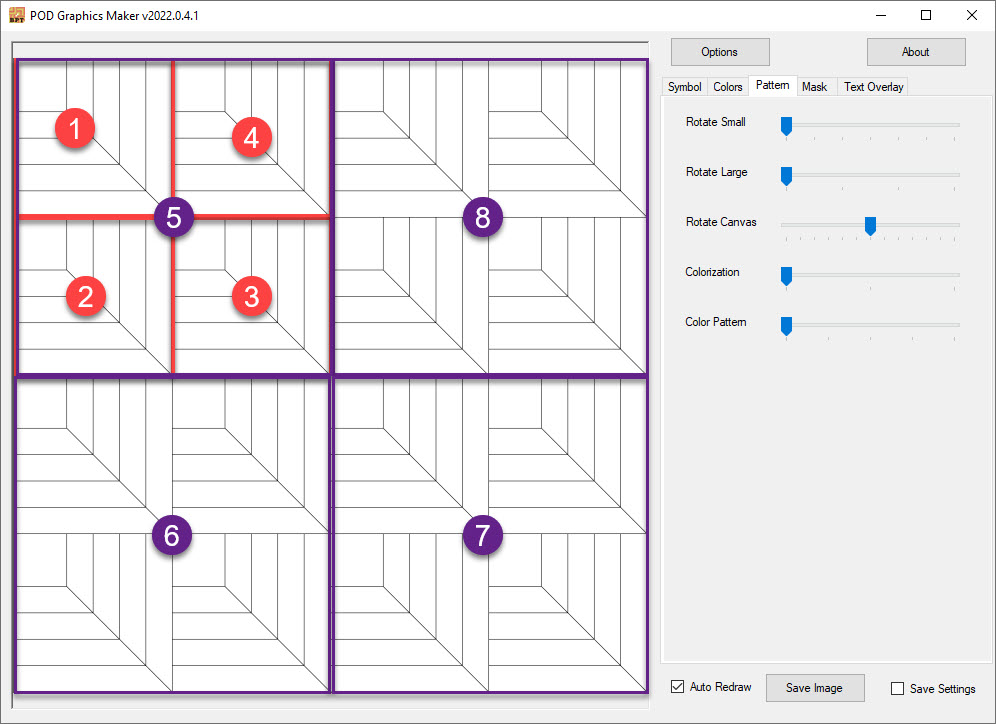
The red squares overlap with the Rotate Small option. They will rotate one quarter clockwise with each step.
The purple squares are for the rotate large option. This uses the clusters of 4 small squares, and rotates in the same way.
You can also rotate the canvas, if you don't like horizontal lines. Beware, if you use this option, it is possible the pattern is no longer repeating.
Mask and text overlay Settings
If you've used any of our software, you already know how masks work. You simply load in a PNG and it'll automatically become a mask.
However, this software also has a built-in mask option. For more information on how to use the built-in masks, check out the tutorial on using masks in Graphics Maker.