How to use the Layout Options in Time Saver
Layout Options for Time Saver
This tutorial presents a short overview of the Layout Options in Time Saver. Currently this feature is available in:
Using the Layout Options

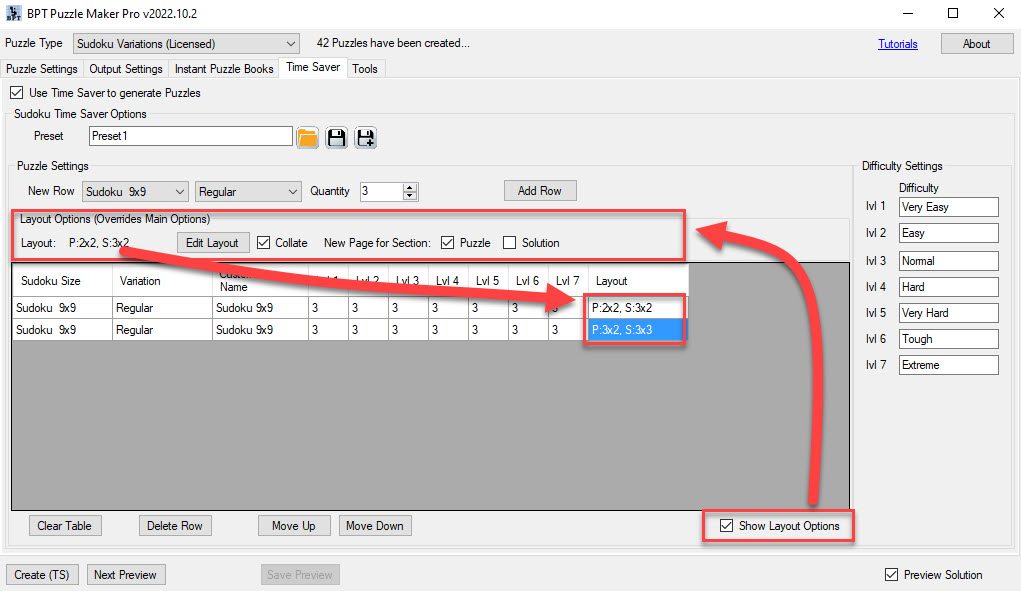
Click "Show Layout Options" to show the Layout Options section. By default, the main Layout settings for Puzzle Maker Pro will be shown.
There are four different options:
- Layout: the actual Page Layout for the puzzles. This can change for each row in the table with puzzles. The value shown at the top (in the Layout Options section) will be used when you add a new row
- Collate: Print puzzles first, and solutions later
- New Page for Section (Puzzle / Solution): start puzzles and/or solutions for the new puzzle type (row in the table) on a new page. This allows you to add pages, e.g. with a chapter heading or with a short tutorial for the puzzle type
Editing the Page Layout
The Layout will be shown as P:3x2, S3x2 or P/S:3x2. P stands for Puzzle pages, S for Solution pages. If you don't use collation, the code "P/S" will be used - in that case puzzles and solutions will be printed using the same layout.
To change the default layout (in the Layout Options section), click "Edit Layout". To change the layout for a single row in the table, click the cell containing the layout. (In the example that would be the last cell in each row, containing the text "P:3x2, S3x2".
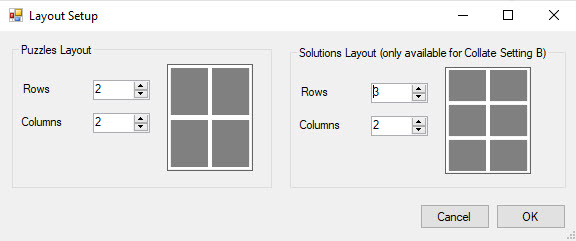
This will display the window to edit the layout:

In this window you can set the layout for puzzle pages by setting the number of rows and columns on the page. A schematic image will update when you change the settings. If you use collation, you can also set the page layout for the solution pages.