How to Get Started with Puzzle Maker Pro - Geometric Mazes
This tutorial will show you how to get started with Puzzle Maker Pro - Geometric Mazes.
When you select the Geometric Mazes module in Puzzle Maker Pro (1), you'll see a window similar to this screenshot:
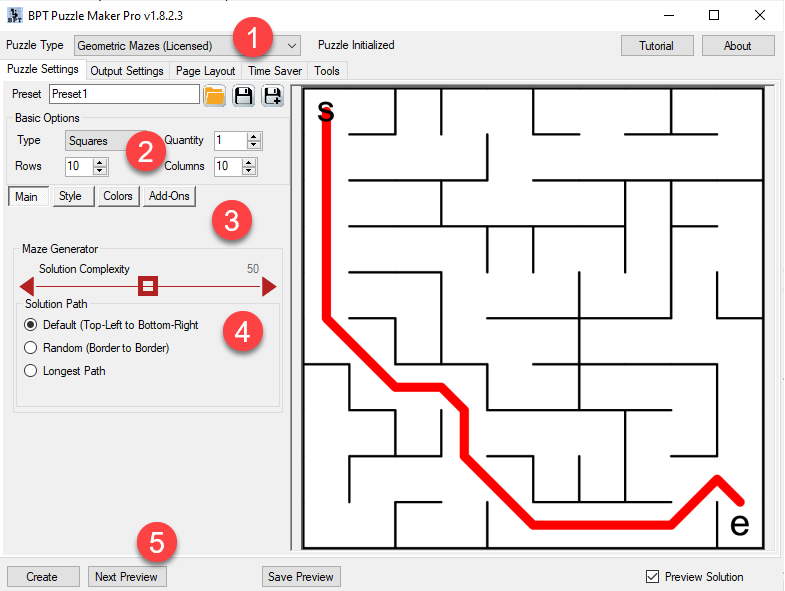
In this window you can:
- Set the type of maze you want, and set the size for your maze (2),
- Configure how your maze will be generated (4),
- Set additional Maze properties such as style and Colors (3)
- Use future add-ons for Geometric Mazes (3)
- And finally - Create or Preview your maze (5).
Different shape types
Puzzle Maker Pro - Geometric Mazes offers 4 different shape types, which are enabled depending on your license. (Read more about Geometric Mazes licenses here).
Squares
Mazes with squares are the most easy to understand: You can set the number of rows and the number of columns for the total maze grid, and the software will generate a nice meandering path using some of these squares. An example is the screenshot at the top of this page.
Triangles
Triangles mazes are made up from triangles, alternatingly pointing up and down. A triangle based maze can never be fully square in size (unless you do some advanced math).
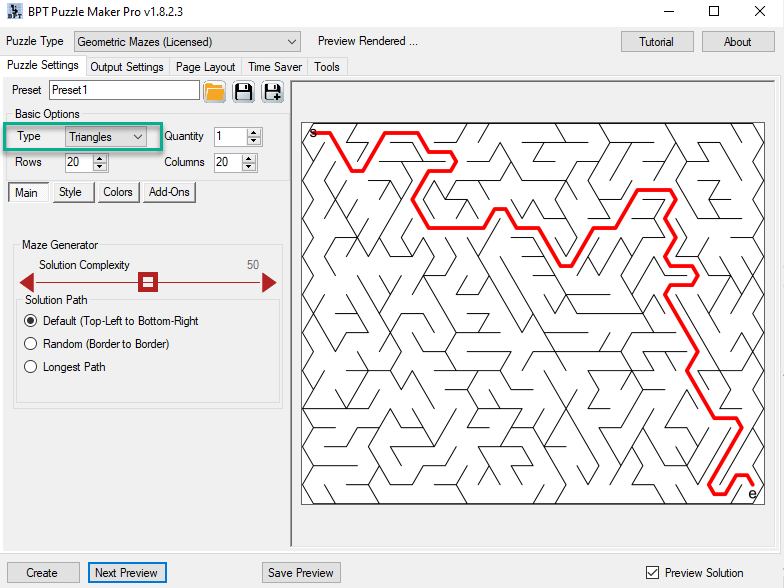
You can see in this image that a triangles maze with 20x20 triangles is not exactly rectangular.
Circle
A circle maze consist of several concentric circles. The number of maze 'cells' in each larger circle will be larger than the smaller circles, to make sure all the cells are more or less the same size.
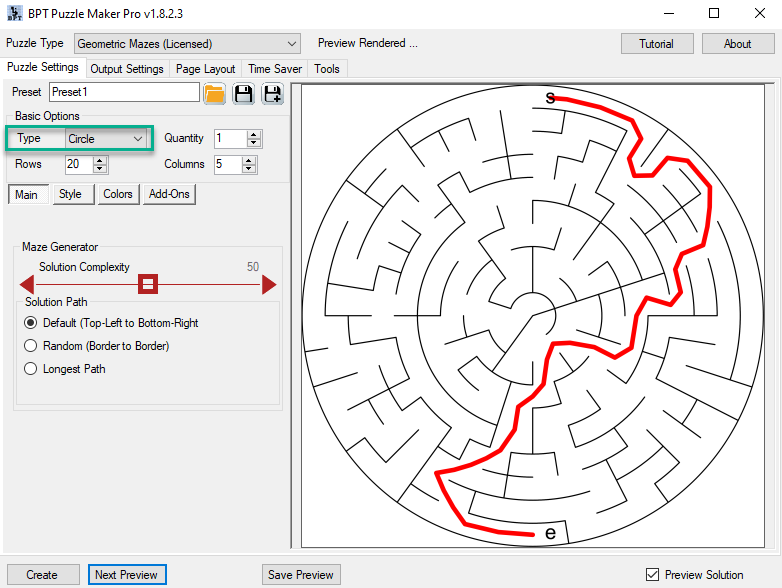
The number of rows and columns for circle mazes have a special logic:
- Rows: The number of rings you encounter when you count from top to bottom or left to right. This setting is actually double the number of circles that are drawn.
- Columns: This is the number of parts of the center circle, which can have a value ranging from 3 to 10. (This is a UNIQUE feature that you won't find in any other maze software). 4 or 6 are great values to work with, but you can experiment with the other numbers. (The math: The total circumference of a circle is 360 degrees. When you set the columns to 3, you get three parts of 120 degrees each. With 10 columns, you get 10 parts with 36 degrees each).
Hexagons
Hexagons are shapes with 6 sides. An example can be seen in this screenshot:
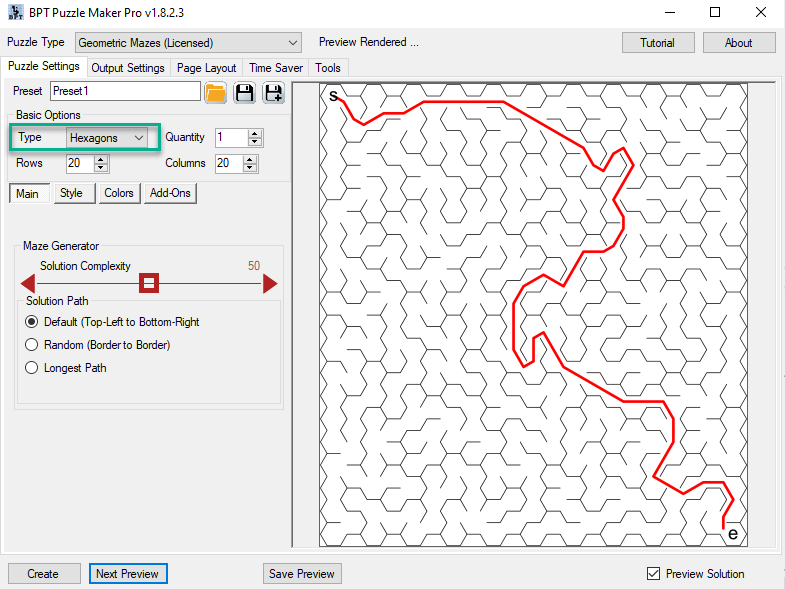
The number of columns that are drawn for hexagons will always be odd, to add corner shapes for bether esthetics.
Links to tutorials to configure all the different settings for Geometric Mazes can be found at the bottom of this page.
Save and Preview
For new Puzzle Maker Pro users:
At the bottom of the window, you can see three buttons and an option (checkbox)
- "Create" will create new mazes. This will use the quantity setting (Basic Options, at the top of the Puzzle Settings tab), to create 1, 2, 5 up to 1000's of maze puzzles. Each puzzle consists of a puzzle image and a solution image. WARNING: for large puzzle sizes (70-100) this may take a while for each puzzle.
- "Next Preview" will generate a new maze that is shown in the preview panel (the big maze image at the right side of the Puzzle Maker Pro window). This is not saved to disk, but is an easy and interactive way to play with the settings and see what happens.
- "Save Preview" will save the current preview.
- "Preview Solution" can be used to toggle the preview panel from solution to puzzle. For mazes it's usually convenient to preview the solution (otherwise you won't see the solution path).