Getting Started with Puzzle Maker Pro - Letterbox
This tutorial describes how to use Puzzle Maker Pro - Letterbox. It applies to:
Introduction to Letterbox Puzzles
A Letterbox puzzle consists of a grid filled with different letters. By removing all letters that occur twice or more, the resulting letters will form a word - read from top left to bottom right. The puzzle in the screenshot below is an example:

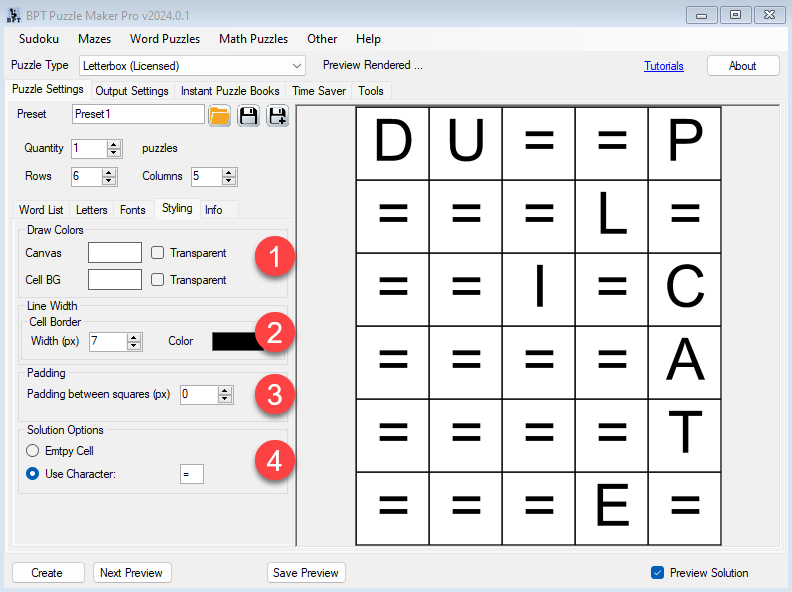
Puzzle Maker Pro - Letterbox Overview
Here's the same screenshot, with some numbers to clarify the different options. Additionally, the general Puzzle Maker Pro features such as Preview, Preview Solution, Output Settings, etc. are available.

Using Your Word Lists
Puzzle Maker Pro - Letterbox works with word lists or text files that have a single word or short phrase on each line. If there's also a clue or description after the word (as in: "word:clue"), the clue will not be used.
Each word must consist of unique letters only, since the aim of the puzzle is to cross off all duplicate letters. (Actually, "duplicate" is a valid word).
After you type or copy your word list, or after selecting a word list file, you can click the "Verify" button to verify all the words in the word list. It will give a warning for words that have duplicate letters.
When generating puzzles, words with duplicate letters will be skipped.
Letter Options

On the "Letters" tab you can find several options to control the letters that are used in your puzzle:
- Even though your word list may contain spaces and other characters, like hyphens or commas, you can easily remove these from the words
- "Fill Characters": After the word is placed in the grid in random positions, the other squares are filled with 'noise', random characters from the set of "Fill Characters" that you provide. By default it's set to the regular English alphabet. Letters that also occur in the hidden word, will not be used as noise.
You can get creative with the Fill Characters, e.g. use only certain letters, or use digits as noise in the puzzle, like the example below:

Using Multiple Fonts
There are several options to make the Letterbox puzzle a bit more lively and chaotic, you can find these on the "Fonts" tab:

- Select the main font by clicking the white panel that says "Arial". Here you can set the font, font color, and some other options.
- If you want to use more than one font, you can set the number of fonts (up to 3). For each letter in the grid, the algorithm will randomly select one of the fonts:

- You can choose to add Bold and Italics letters to the puzzle. Random letters will be Bold or Italic, if the selected font supports this.
- Add more color variations: Use up to five colors or gray shades in your puzzle (see next paragraph)
- Click "Next Preview" to generate a preview with the changed settings. The preview will be shown in the preview panel at the right.
Using Multiple Colors

You can also use multiple colors or multiple gray shades for the letters. In total you can use five different colors:
- You can select a color in the font properties window. When you use three different fonts, you can select a different color for each font. These colors will be randomly assigned to each letter. (That means: If you select a red color for "Arial" and a green color for "Times New Roman", you can get four different combinations: Arial/Red, Arial/Green, Times New Roman/Red and Times New Roman/Green)
- You can also add two more colors by selecting the "Color Variations" option. You can then use the two color panels to select additional colors
- You can mix and match: You can select up to three different fonts and use the same color for each, you can also select "Arial" three times, but select a different color for each font.
Styling
The "Styling" tab offers several options to change the look and feel of your Letterbox puzzle, in addition to the differernt font options.


- Solution Styling: You can either use an empty cell instead of the 'noise' characters, or use a symbol of your choosing, for example the "=" symbol: