How Can I Create Books with Easy Puzzle Books (plugin for Powerpoint)?
Getting Started
This tutorial explains the steps to create puzzle books using Easy Puzzle Books (plugin for Powerpoint).
If you are using Puzzle Maker Pro, you can quickly create puzzles and puzzle books with a single mouse-click. However, there is a lot of puzzle-software available - free and commercial - that only creates the puzzles, not the books. That's where Easy Puzzle Books comes in. (It may not work properly with certain Puzzle Maker Pro puzzle types, such as Word Search or JigSaw).
Install the Plugin
First of all, you'll need to install the software: Easy Puzzle Books is a plugin for Powerpoint - it requires MS Windows and MS Powerpoint to be installed on your computer. It does not work with the cloud (browser) version of MS Office / Powerpoint.
If you haven't installed the plugin yet, you should do that first. There's a tutorial for downloading and installing the plugin here.
Start the Plugin
To start Easy Puzzle Books, open the "Add-ins" ribbon in Powerpoint (this is a menu option, usually just to the left of the Help Menu).
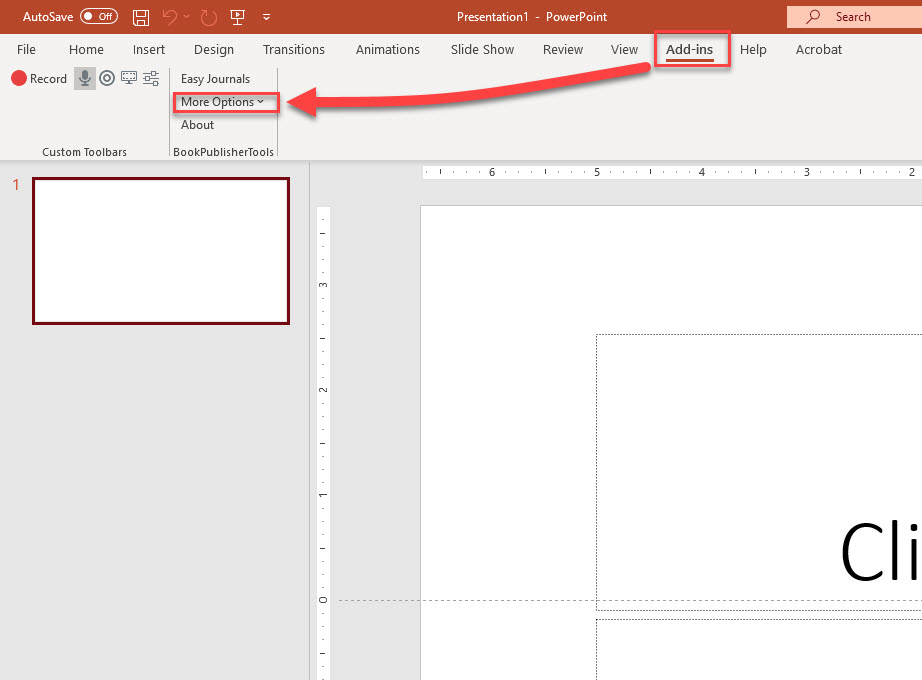
The Add-ins ribbon should contain the BookPublisherTools group of options. Click "More Options" to open the dropdown menu, and select "Easy Puzzle Books".
Easy Puzzle Books - Overview
The Easy Puzzle Books plugin will open a panel at the right (just like the shape edit panel in Powerpoint). The panel has three tabs:
- Auto - Automatic puzzle book creation - you'll still have to set up the puzzles and the layout, but after that it's automatic. We'll cover the details below;
- Manual - This is a little bit more complex - you'll create a grid with placeholders first, and then fill the placeholders with puzzles. There's a separate "Manual Book Creation" tutorial, but it's best to start with automatic book creation, to learn how the plugin works;
- Page Setup - Quickly set up the proper trim size for Powerpoint.
First things first: Page Setup
Always set up the page size first, otherwise you'll be generating grids and puzzle page in the wrong format later. Page setup should be straight-forward, and there's a tutorial if you get stuck.
Automatic Book Generation
As you can see in the screen shots, there are 5 steps to set up and create your puzzle book:
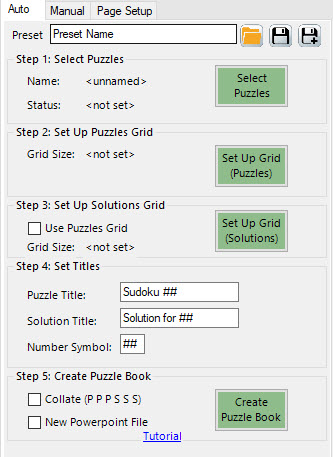
At the top of the tab page is a "Preset" section: You can save the entire book setup as a preset, and retrieve it later. This will NOT save the Powerpoint contents, and saving the Powerpoint file will NOT save the Easy Puzzle Books data!
Step 1: Set up the puzzles
Select puzzle and solution files on your computer for your puzzle book. Click the green button "Select Puzzles". More details can be found in the Puzzle Setup Tutorial
After selecting the puzzles and solutions, you should see the status information next to the green button.
Note: For Easy Puzzle Books it's not required to enter a name for the set of puzzles.
Step 2: Set up the Puzzles Grid
Easy Puzzle Books will use a grid-style layout for your puzzles, e.g. 1 per page, 2x2, 3x4, etc. Click the green button "Set Up Grid (Puzzles)" to set up the number of puzzles per page and the margins and padding. Details can be found in the Grid Setup Tutorial
When the grid setup for the puzzles is done, the selected grid size should be shown next to the green button.
Step 3: Set up the Solutions Grid
There are two options for the solutions grid:
- It can be identical to the puzzles grid. Click the "Use Puzzles Grid" option and make sure it's checked. This is usually the best format if you want to create a solutions page right after each puzzles page;
- Set up a separate grid for the solutions - for example you can have 6 puzzles on a page and 12 solutions on a page
Setting up the solutions grid is done identical to the puzzle grid.
Step 4: Set Titles for Puzzles and Solutions
The next step is setting your titles for the puzzles and solutions. This is totally up to you.
The "Number Symbol" can be changed as well - this is a placeholder in the title that will be replaced with the right puzzle or solution number, when the book is created.
Step 5: Create Puzzle Book
The final step is to create a puzzle book, using the settings specified in the previous steps.
There are two options here:
- Collate - Print the puzzles first and the solutions later. if unchecked, it will print a puzzle page, then a solution page, then the next puzzle page, etc
- New Powerpoint File: It's possible to create the puzzle pages in a new Powerpoint file. It will automatically copy the page setup (width and height) from the current file. Otherwise the new pages will be appended at the end of the current Powerpoint file.
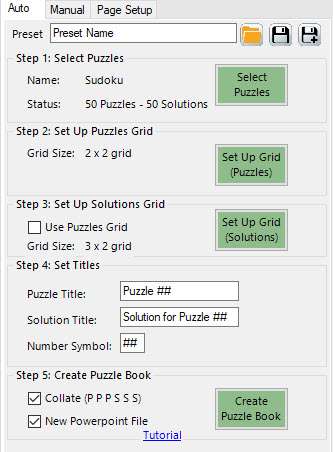
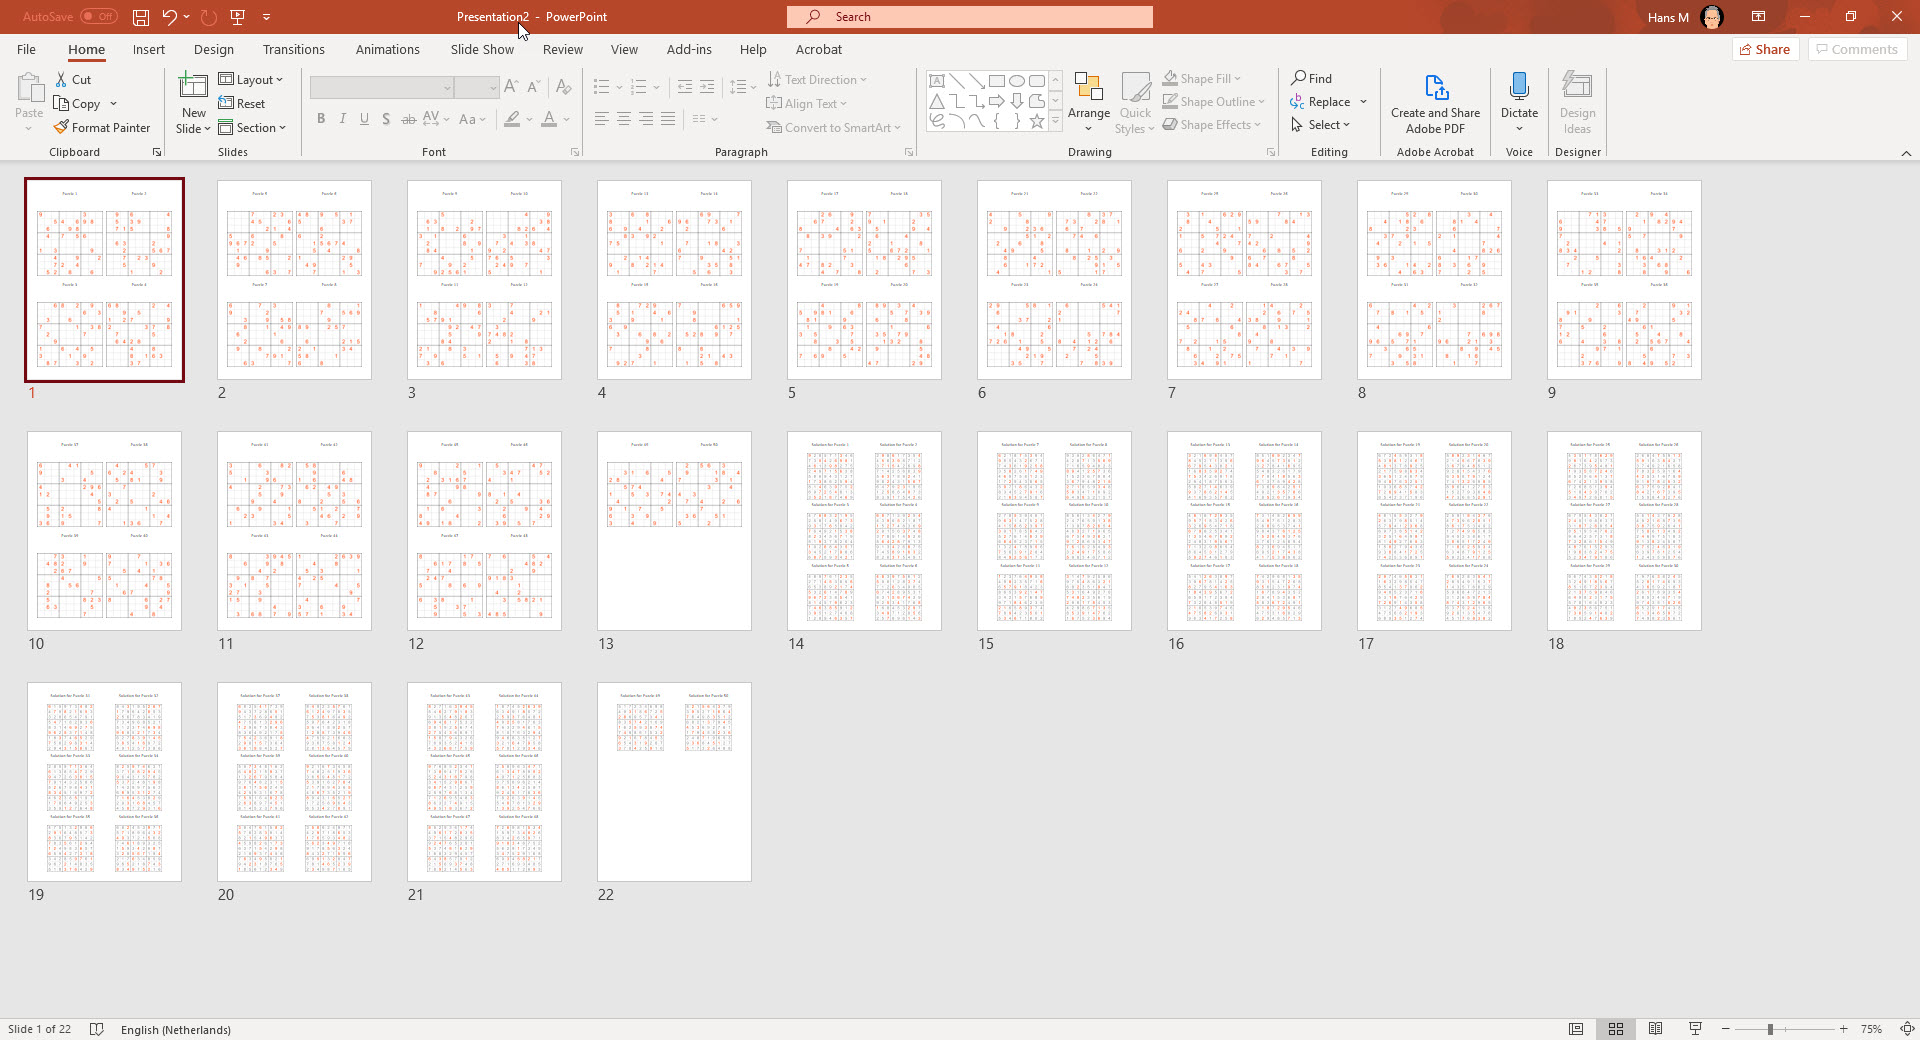
Example
To show you what it can look like, this screenshot shows the setup for a sudoku puzzle book with 50 puzzles. The next screenshot shows the pages that have been generated in Powerpoint.
Next steps
In many cases the automatic puzzle book creation will be just what you need. It's fast.
Once you have a configuration that works for you, with the proper grid sizes and margins, you can even save the entire setup as a preset, to use for several books. Each time you create a new book, you can load the preset, and change the puzzle and solution files.
It's possible to have many presets, for example if you publish different book sizes or different puzzle types.
Manual Puzzle Book Creation
With Easy Puzzle Books you can also customize the grids, page style, fonts, etc before filling the templates with puzzles and solutions. This is called Manual Puzzle Book Creation. You can find a tutorial here.